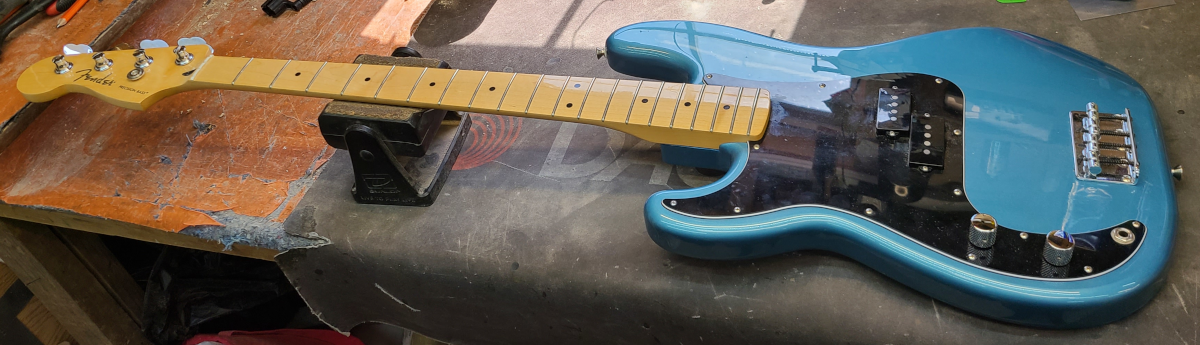
The idea for this bass was prompted by the client’s disgust for its blue paintjob.
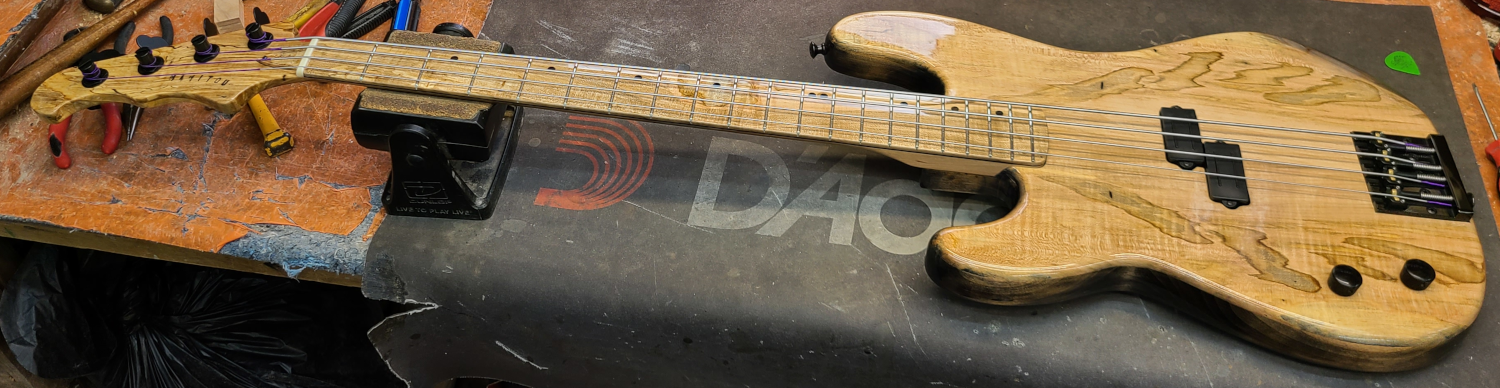
After some discussion, we decided on replacing the neck with an originally designed headstock shape, and stripping the alder body, gluing up a spalted maple cap, and staining the alder back & sides with black dye.
Additionally, it would get all black Hipshot hardware, and a Dimarzio Split-P pickup.
The neck profile will essentially be a clone of the original neck, but with a few choice modifications.
In its original state, this bass had a terrible buzz on the open A string, that was simply just a result of how it was made – with a 0° headstock.
The string tree safeguarded the D and G strings from buzzing, and there was a sufficient break-angle on the E string, but the only way to get the A string to stop buzzing when played open was to leave about 5" of extra slack when replacing the string.
The idea is to generate enough winds around the tuning post so that the resulting down-pressure of the extra winds is enough to stop the sitar-like buzzing on the open A – but this is more like “just treating the symptom” versus actually fixing the cause.
Perhaps a better option would be to replace the factory string-tree with one of the 3-string variety, so all 3 of the top strings would be covered, but this is still an imperfect solution because it would have to be relocated towards the nut, leaving an vacated hole from the old string-tree, that would have to be filled in.
Luckily the client opted to flat out replace the entire neck!
This is but one of a few reasons that I prefer to build every headstock at a 13° angle.
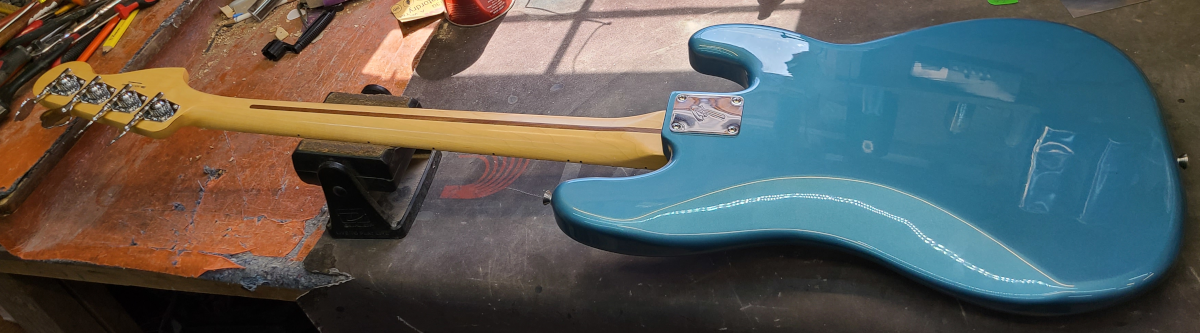
Here’s how the bass looked originally:
The Process:
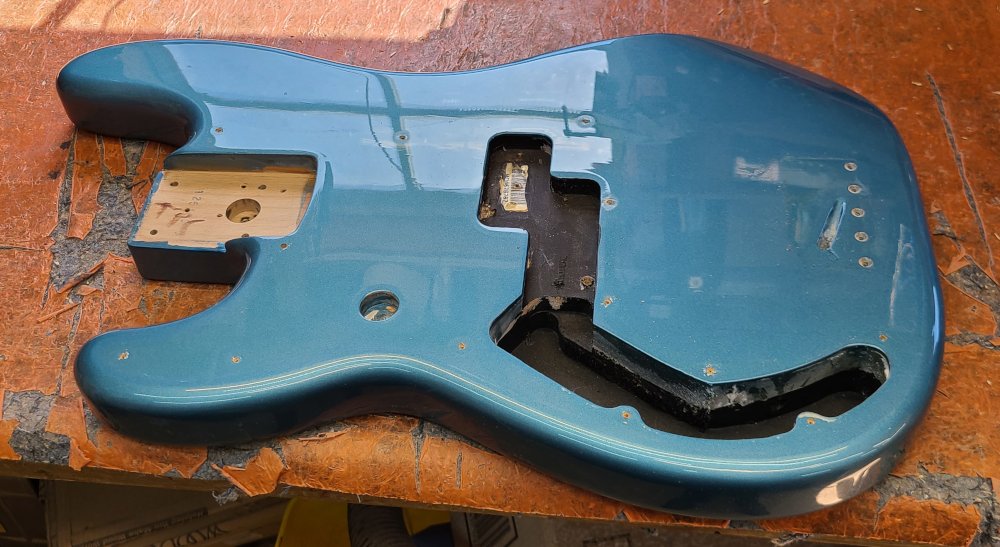
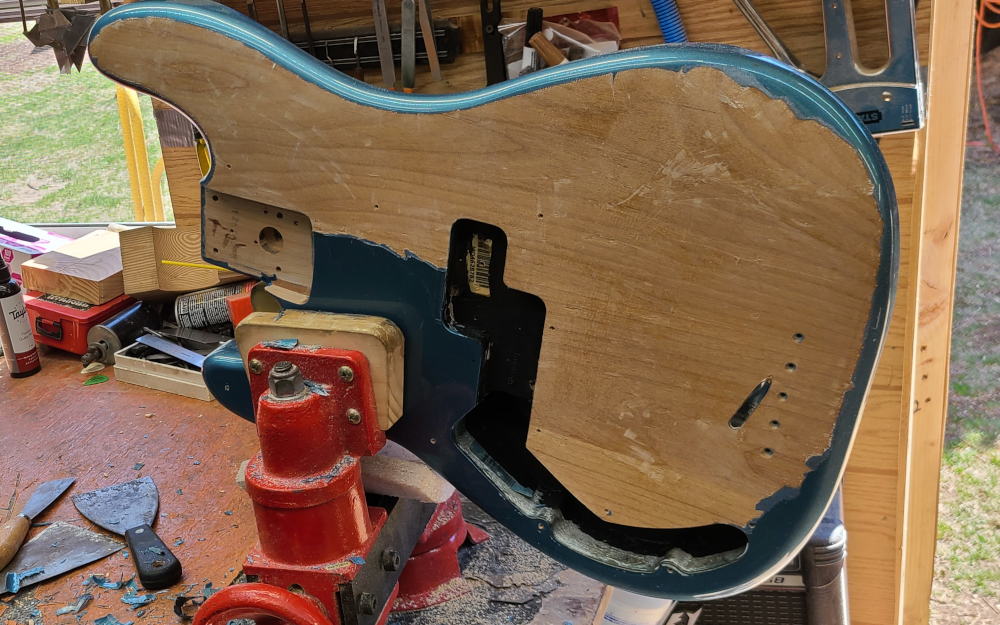
With the parts all stripped and set aside, the first order of business is to strip the body paint.
A heat gun and metal putty knife made relatively short work of stripping the finish down to bare wood.
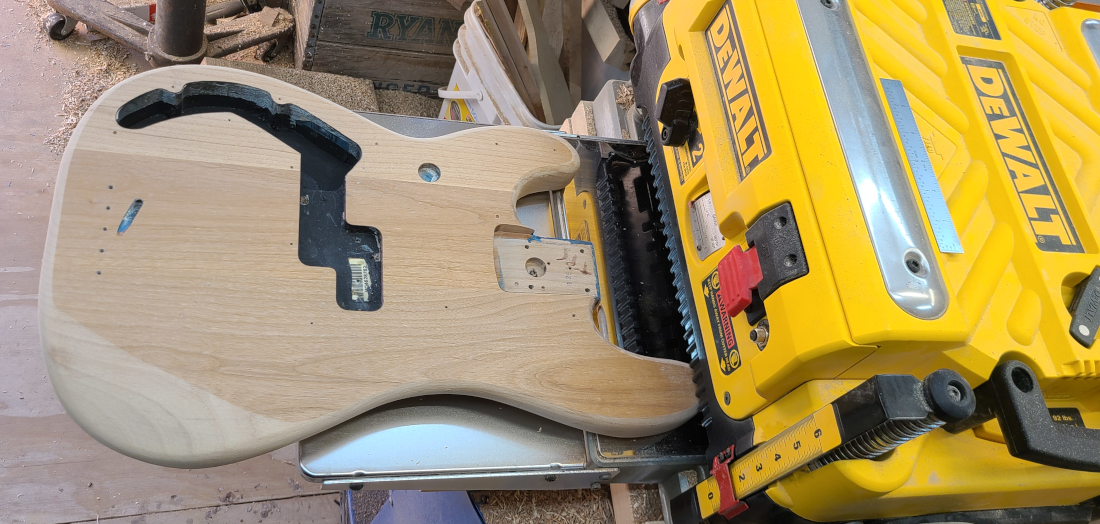
The blue is gone, now I’ll just sand any remnants off with 80-grit sandpaper, since the next step is to send it through the planer.
The top is now planed down 1/4" to make room for the maple cap.
The top is now thinner, and the body is now ready prepped for the cap, and can now be set aside until it’s time to glue.
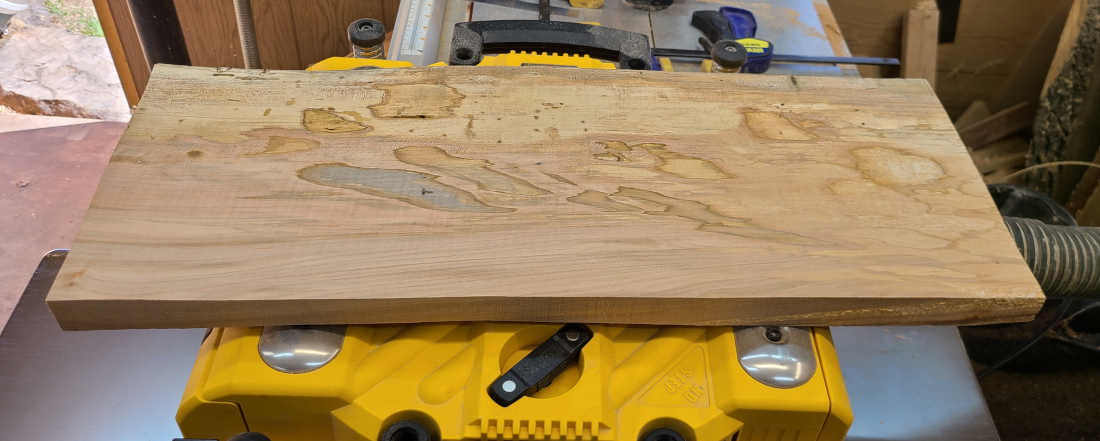
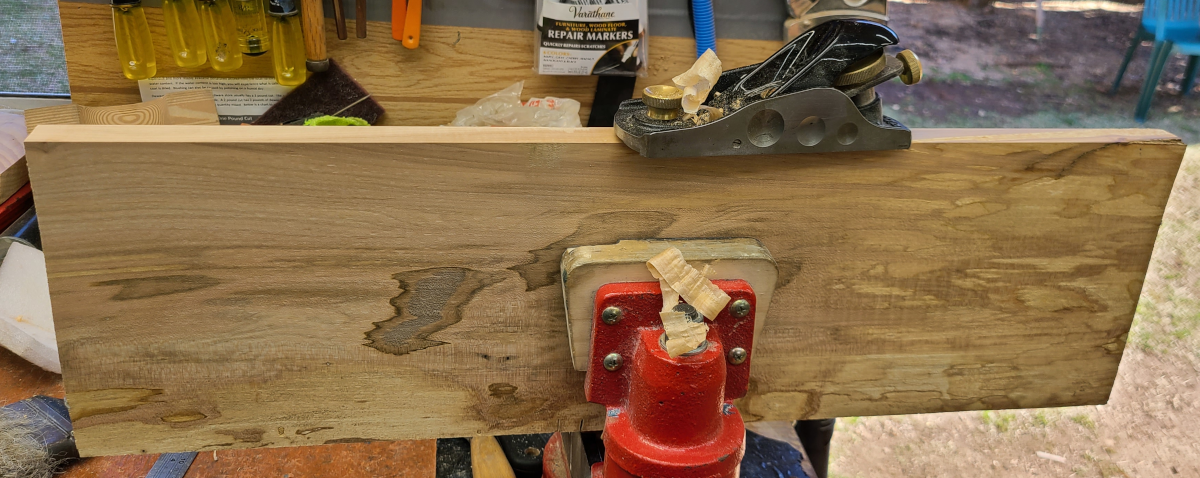
After selecting the right cap billet, the top and back are planed flat, and the piece is now ready for resawing.
After the front and back are flattened, one side is chosen and hand-planed at 90°.
This will help with the following step.
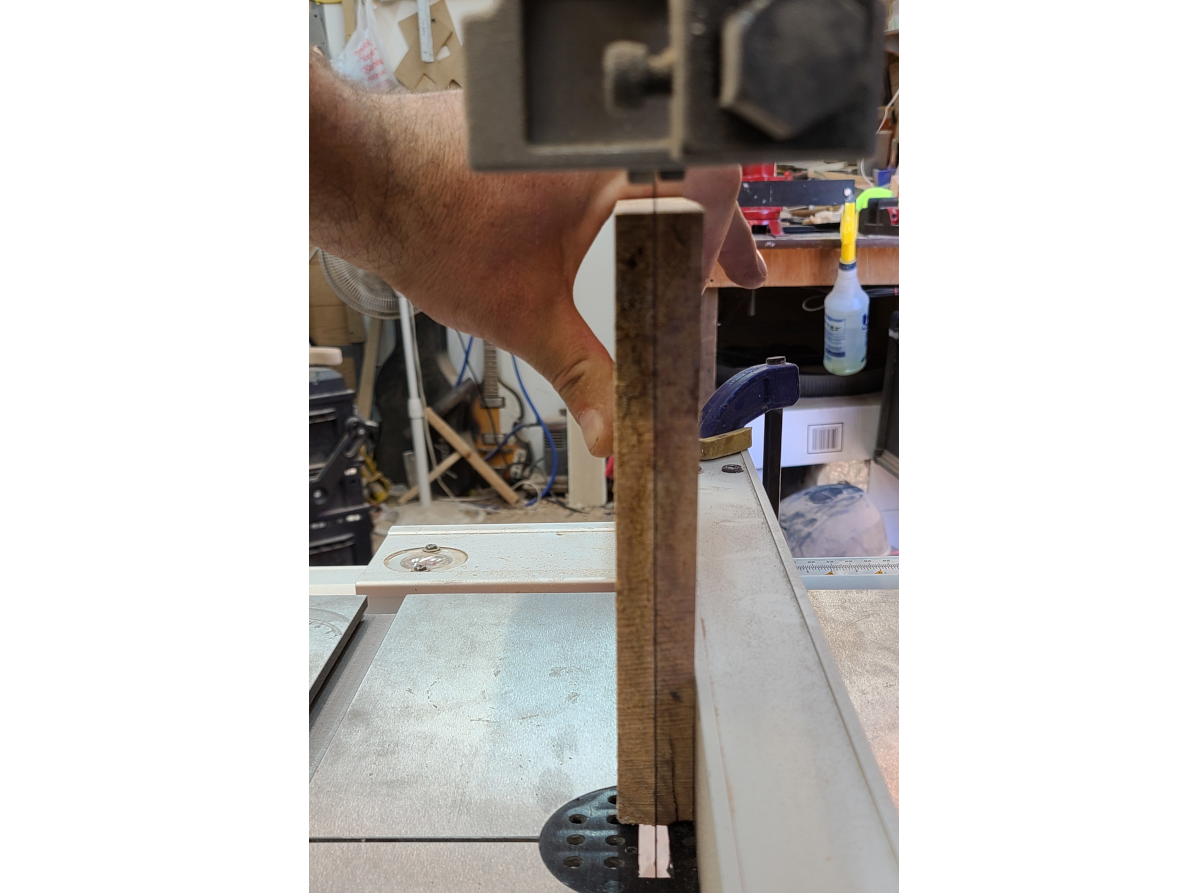
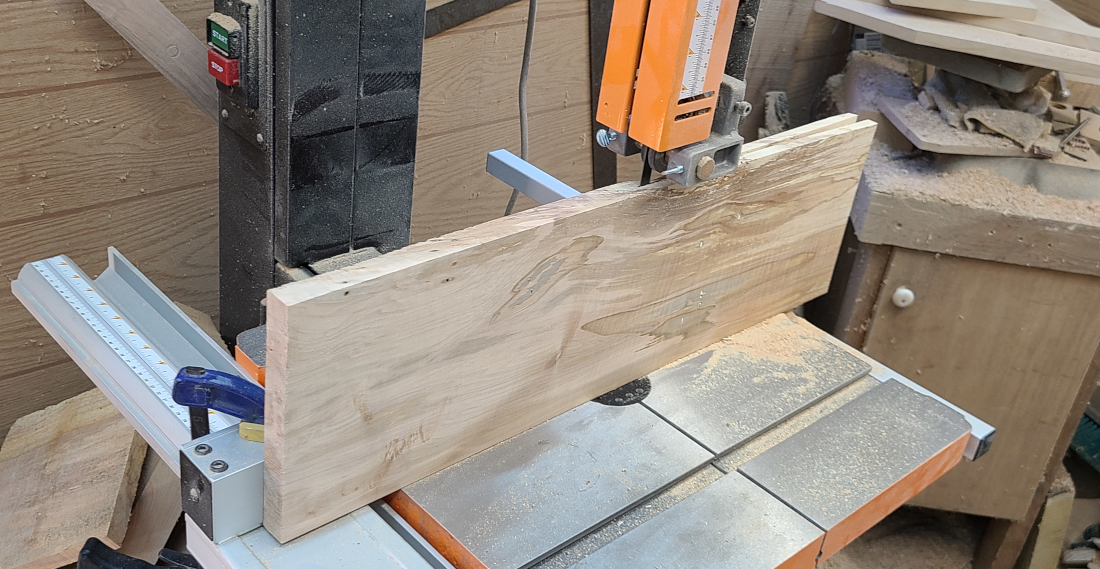
With the fence set at 3/8", the cap billet is resawn in half.
The billets are milled out of the log at 1" per cap, which will allow plenty of material for the end result of a 1/4" thick cap.
Since the cap isn’t really considered structural, preference is given to the more visually striking pieces.
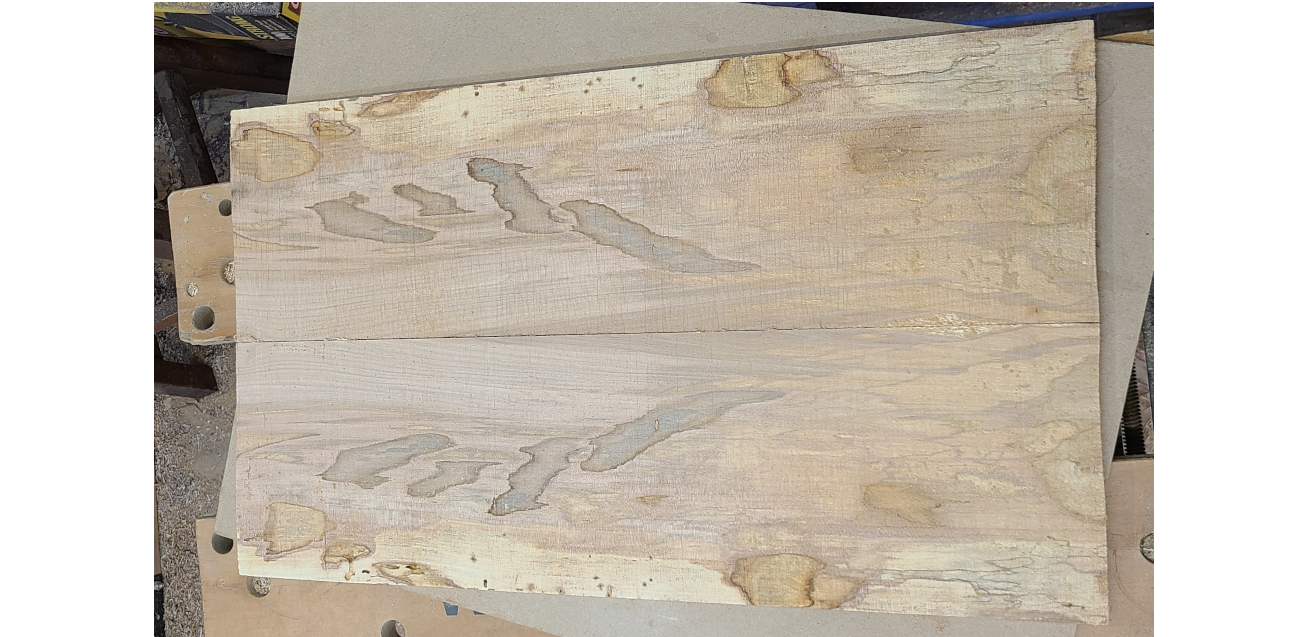
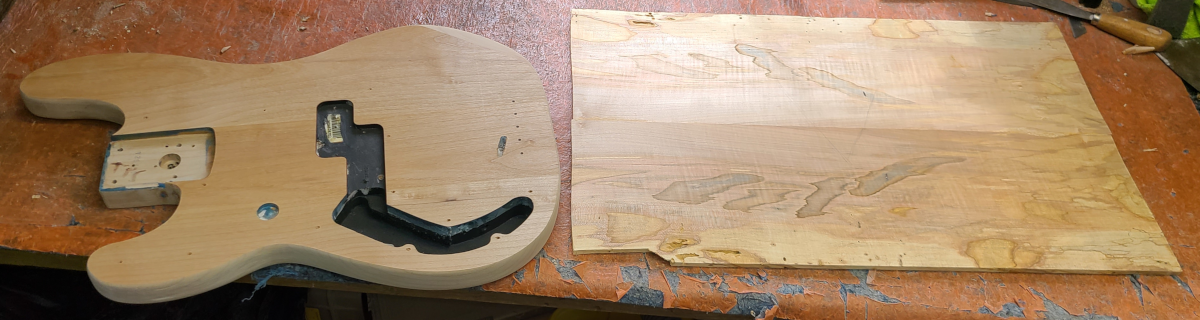
After resawing, the cap is left with the rough sawn edge, and bookmatched together in the gluing deck.
24 hours later, the bookmatched cap is taken out of the gluing deck, and now we have an idea of how the end result will look.
Finally, the excess glue squeezeout is scraped off, and the saw marks are sanded out, with 150-grit sandpaper.
Both sides are dead flat, and the cap thickness is now at 1/4" in all places.
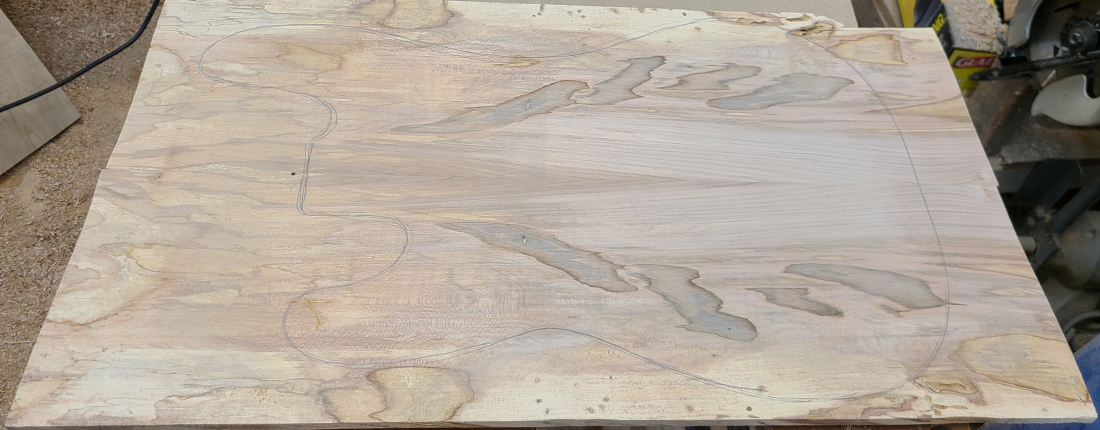
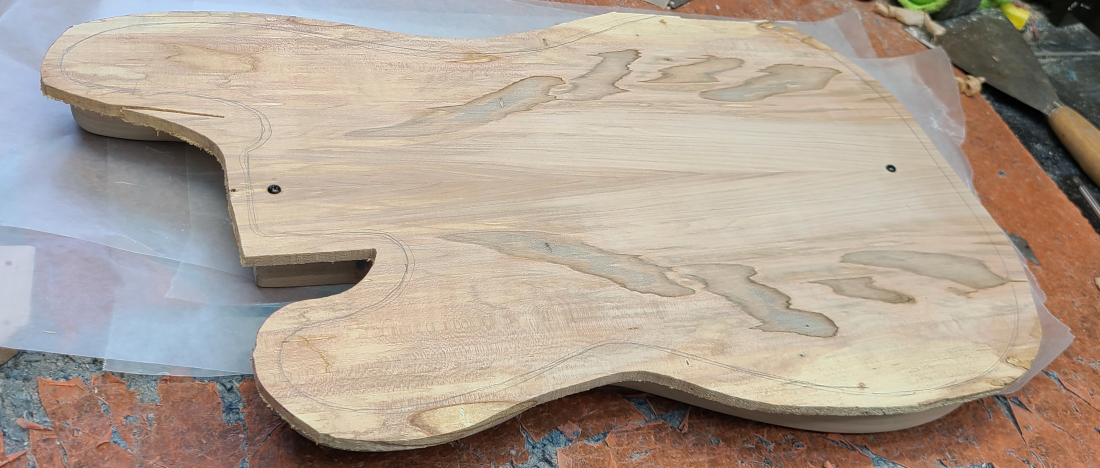
The body is traced onto the template, in the desired orientation.
This specific area was chosen due to the ambrosia figure lining up with the shape of the body, and because the “boring” areas towards the center will be covered by the bridge, strings, and pickups – so no figured areas will go to waste.
In order to keep the cap in perfect alignment while under clamping pressure, 2 screws were used at either end of the cap to keep it from slipping.
One screw was drilled into the center bridge-mounting hole, and the other was drilled into a block that was secured to the body through the already existing neck-mounting holes.
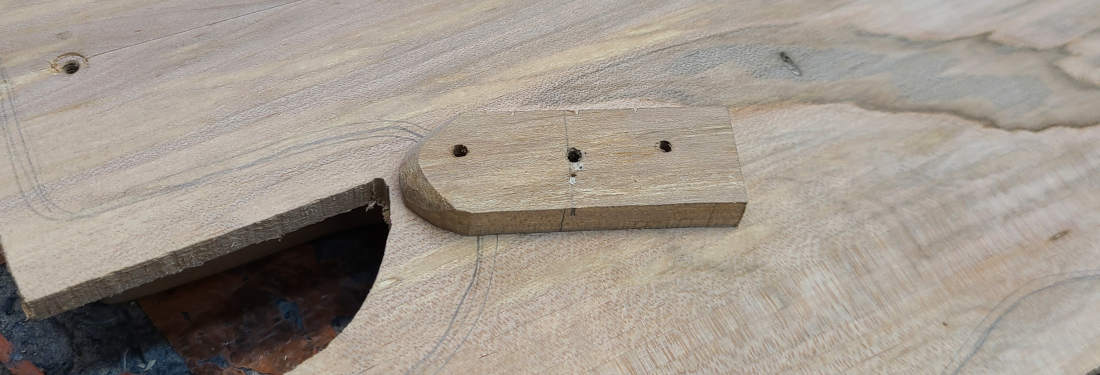
This neck pocket furring block was needed in order to anchor the other side of the cap to the body.
The block is screwed into place by 2 screws through the neck mounting holes on the back, and through the center on the top cap.
It is exactly the same thickness as the depth of the neck pocket, with the centerline marked out for ease of placement.
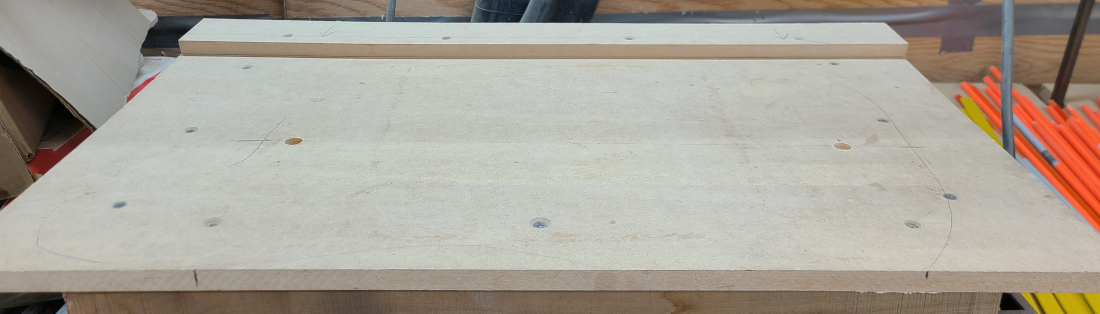
The anchor screws protruded from the cap surface slightly, so 2 relief holes were drilled into the deck surface.
This cap will be clamped upside-down so that the body will be used to evenly spread the pressure of the gobars.
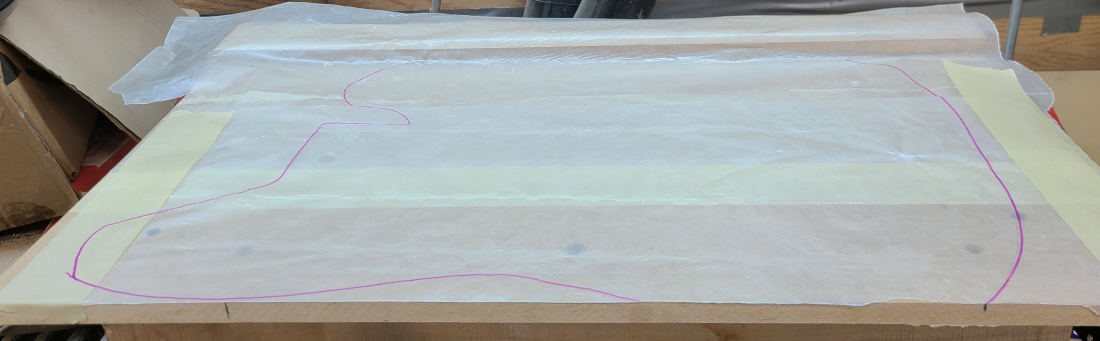
Wax paper is taped to the gobar deck to catch any glue squeezeout, and the cap is traced in marker so it can easily be lined up to the aforementioned screw relief holes.
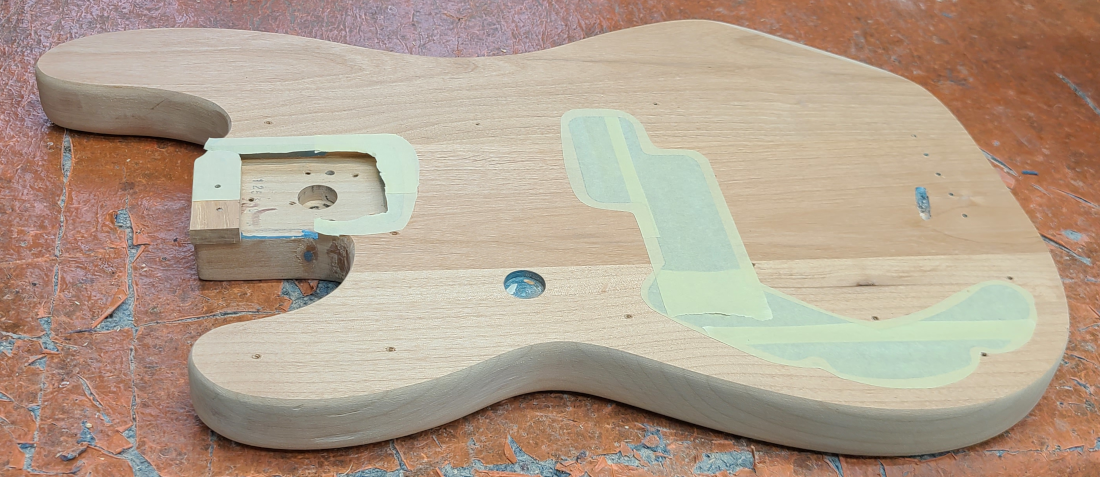
Next the cavity perimeters are protected from glue squeezeout, so glue isn’t spread into both the neck pocket and electronics cavities.
The tape will be removed prior to clamping.
The glue is spread onto the body surface, and the masking tape is removed
The cap is screwed on, and placed into the outline on the wax paper.
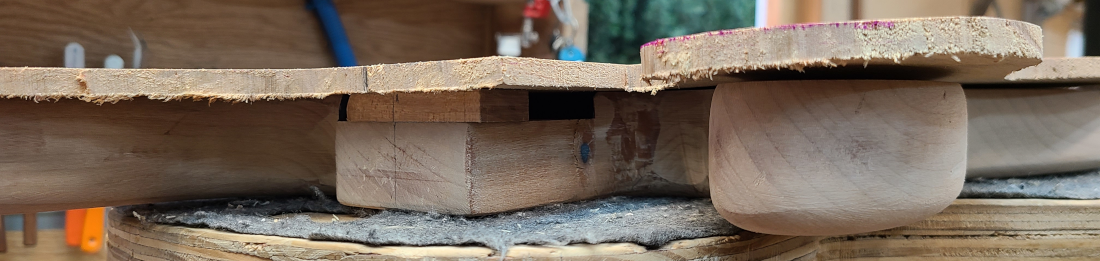
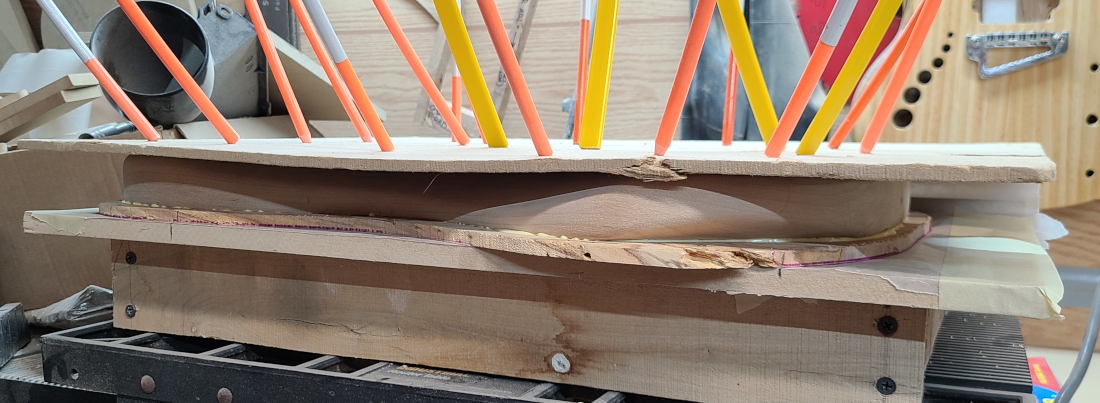
A 1/4" piece of MDF is placed over the back of the body to protect it from gobar divots, and the fiberglass gobar rods are set into position.
The glue squeezeout is looking even and not a single gap in sight.
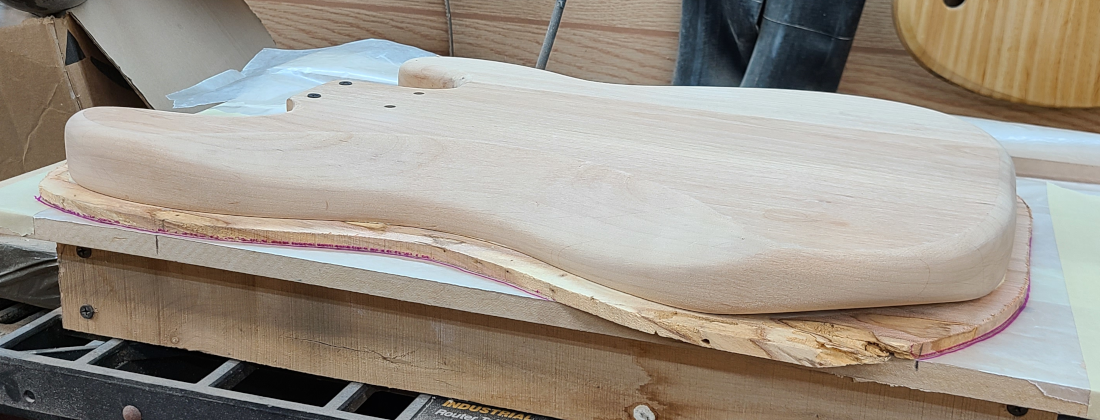
The following day, the body is removed from the deck, the pinning screws and block are taken out.
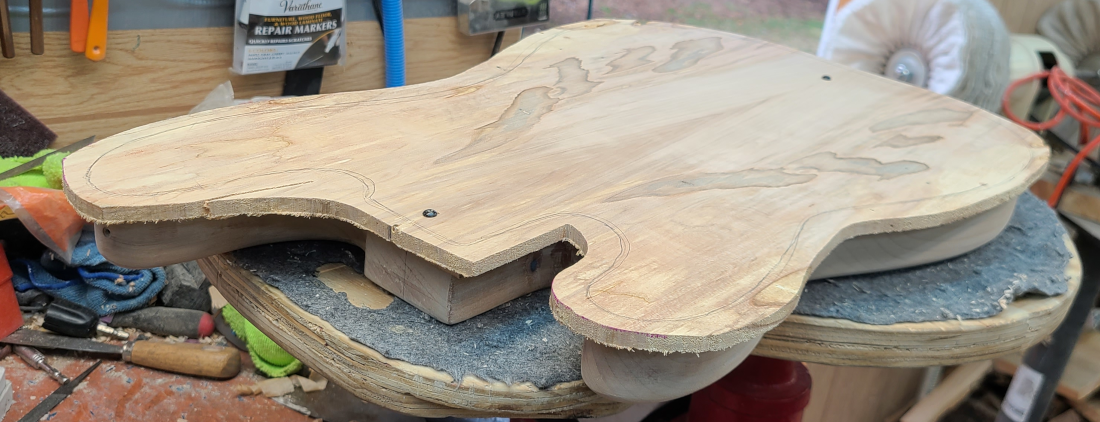
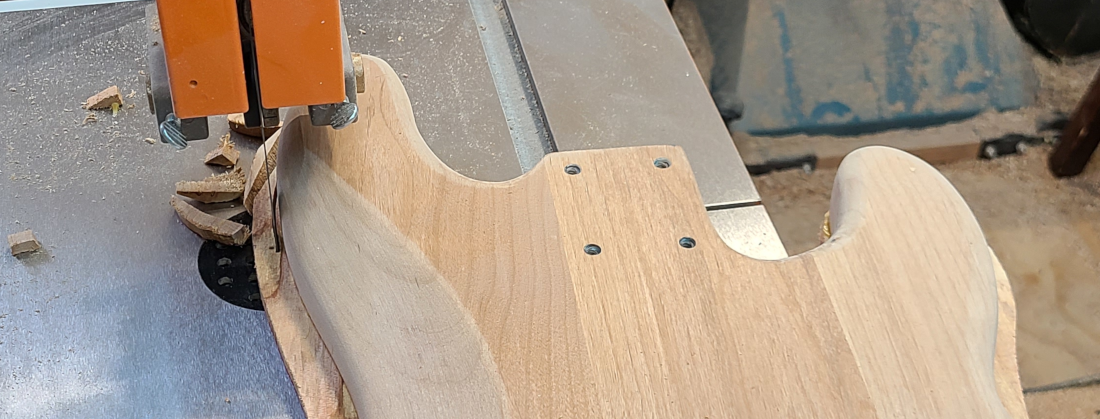
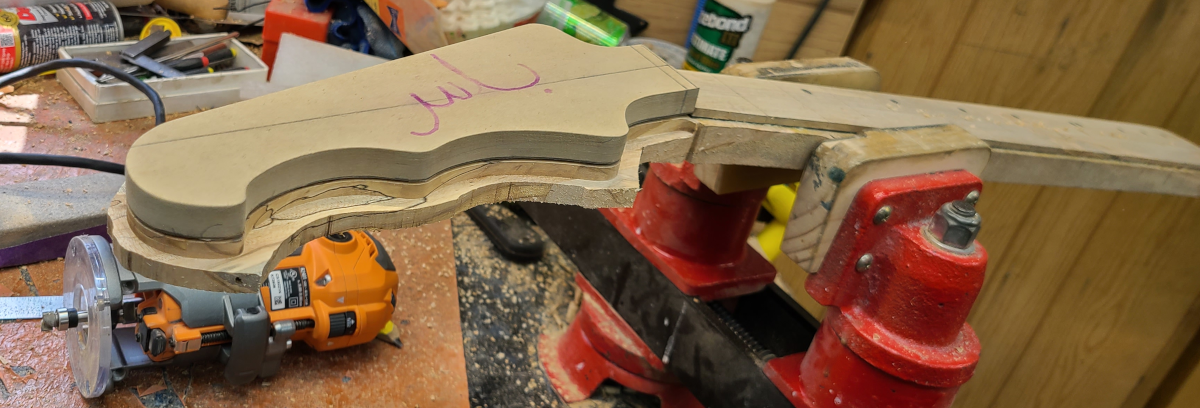
Before the edges of the cap can be routed flush with the body, the excess material must be trimmed off with the bandsaw.
The edges are trimmed within 1/8", so the router bit doesn’t get stressed out, or gouge out chunks from the cap.
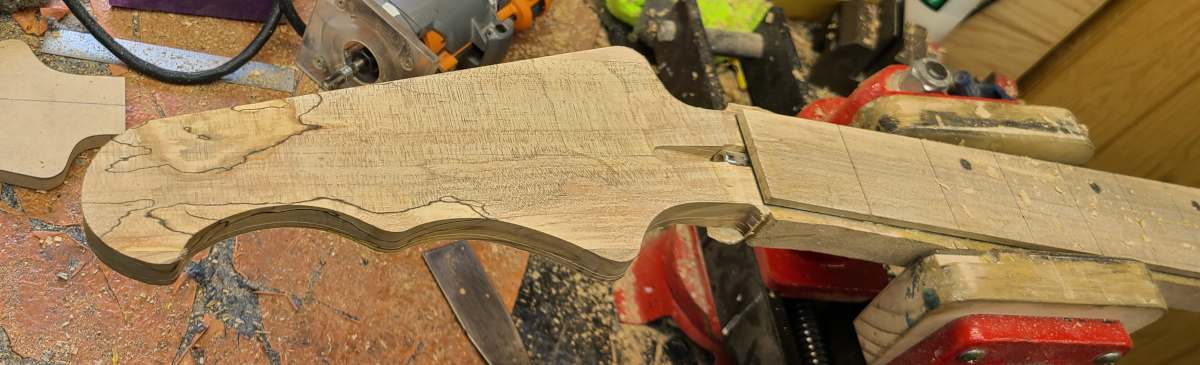
The edges have been routed flush at this point, but it looks like there is a gap due to the heavy roundover done to the body from the factory.
This will have to be finished up by hand.
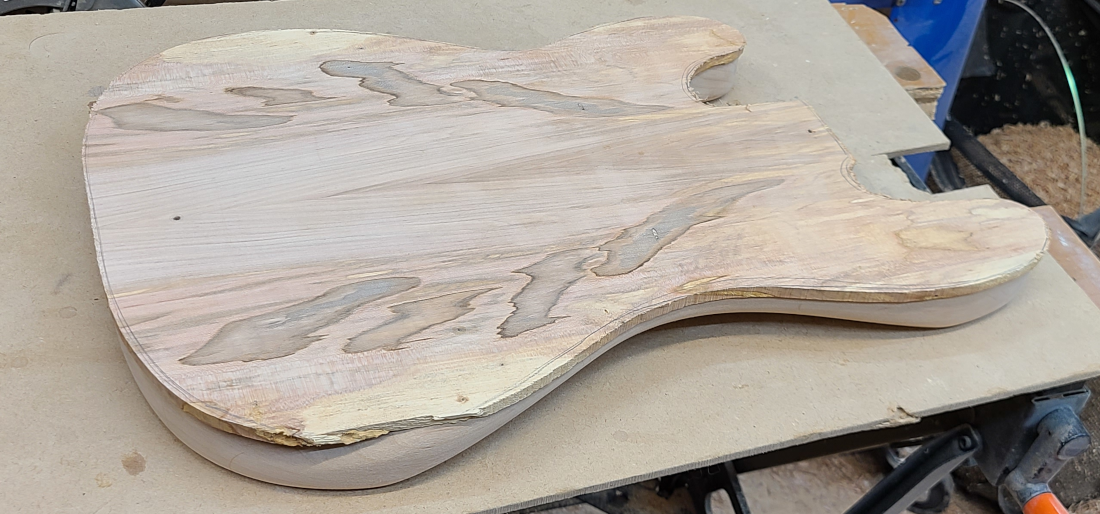
The unsightly tearout located on the armrest area won’t be a problem, since that part will be removed later.
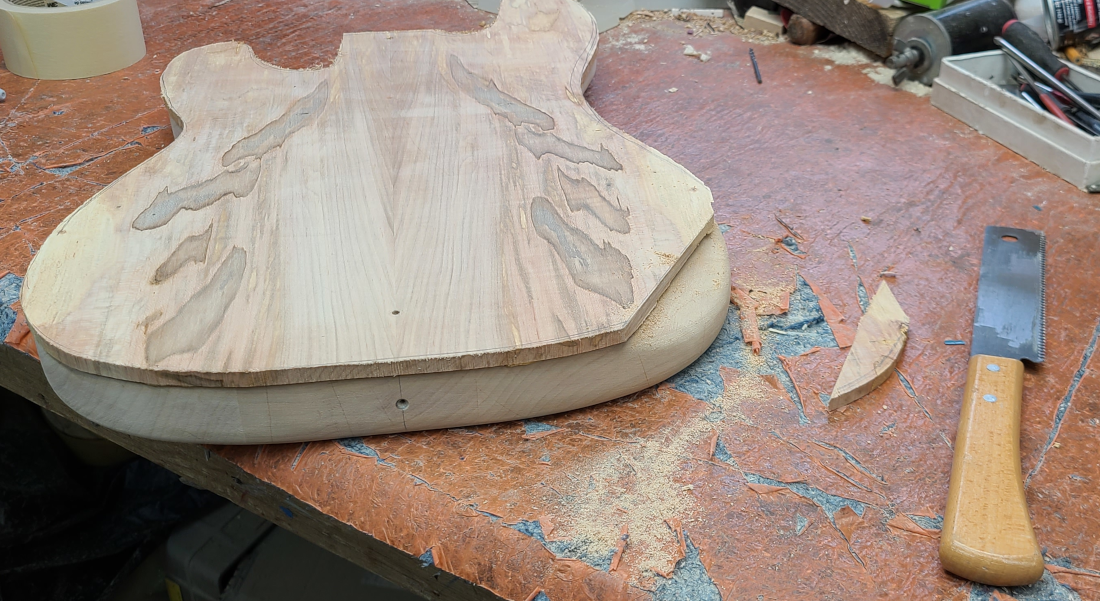
First the excess is cut in a straight line with a small handsaw.
Then the area is beveled with a rasp.
There is a pencil line to mark where the beveled plane of the body will be located when it reaches the face of the cap, and careful attention is paid to not go past that line.
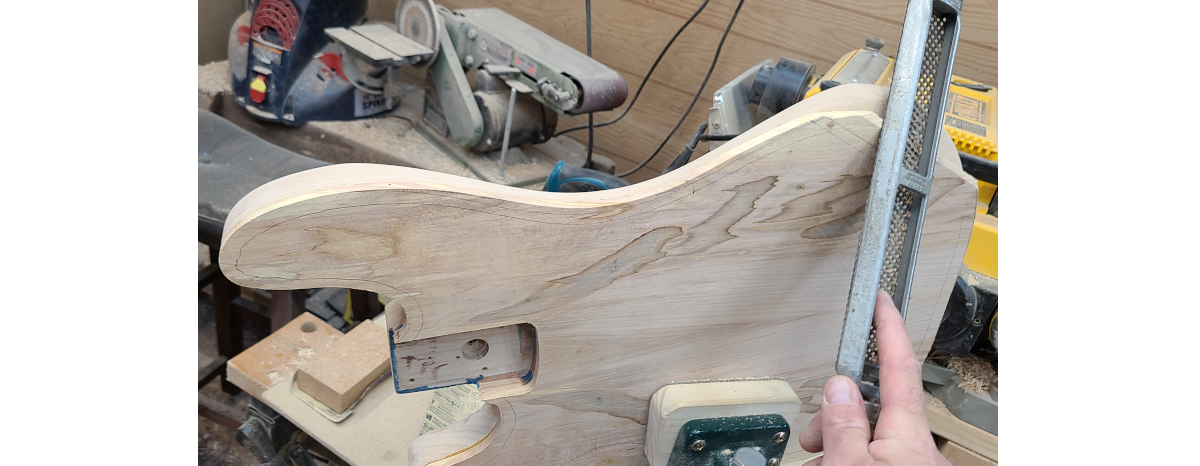
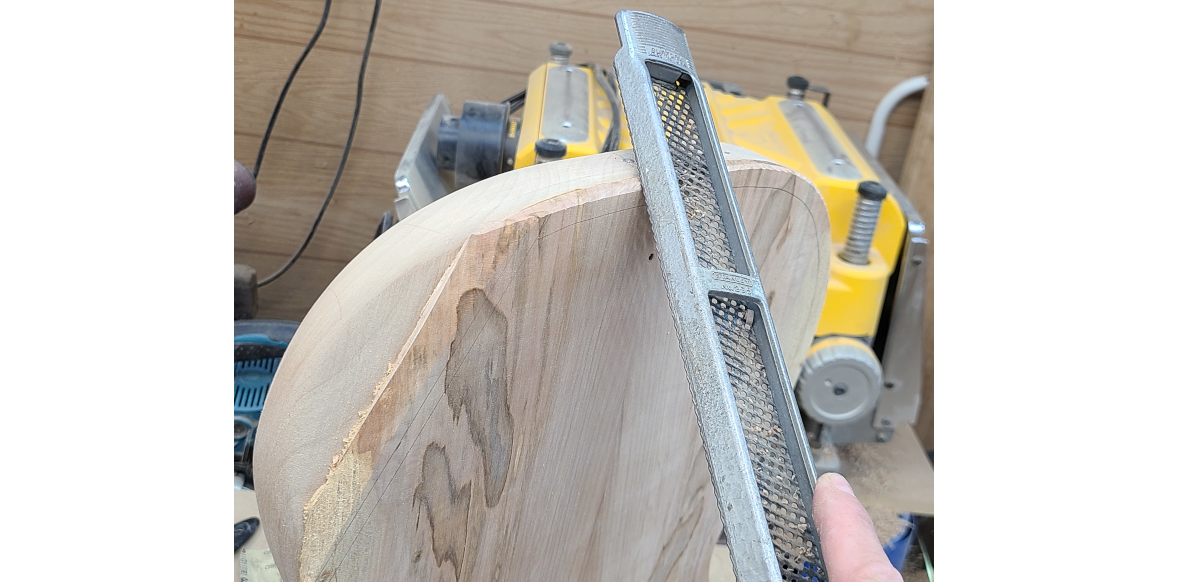
After the armrest is roughed in, I make my way around the rest of the edge of the cap.
Next up is a coarse file, making my way closer to the pencil line.
The process is repeated to the other areas along the body perimeter.
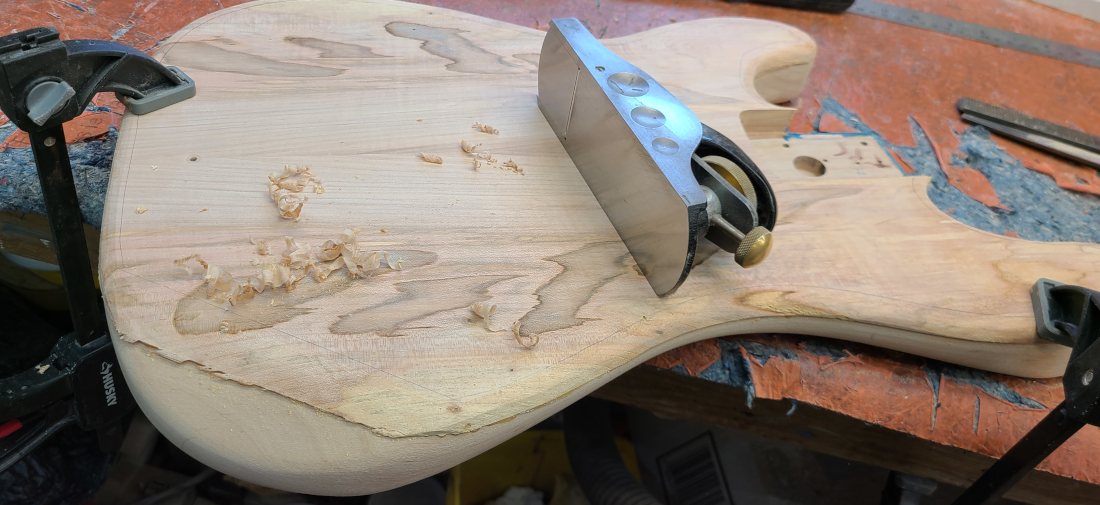
The block plane was useful here, since it makes such a clean cut that I didn’t have to worry about hitting the existing body bevel.
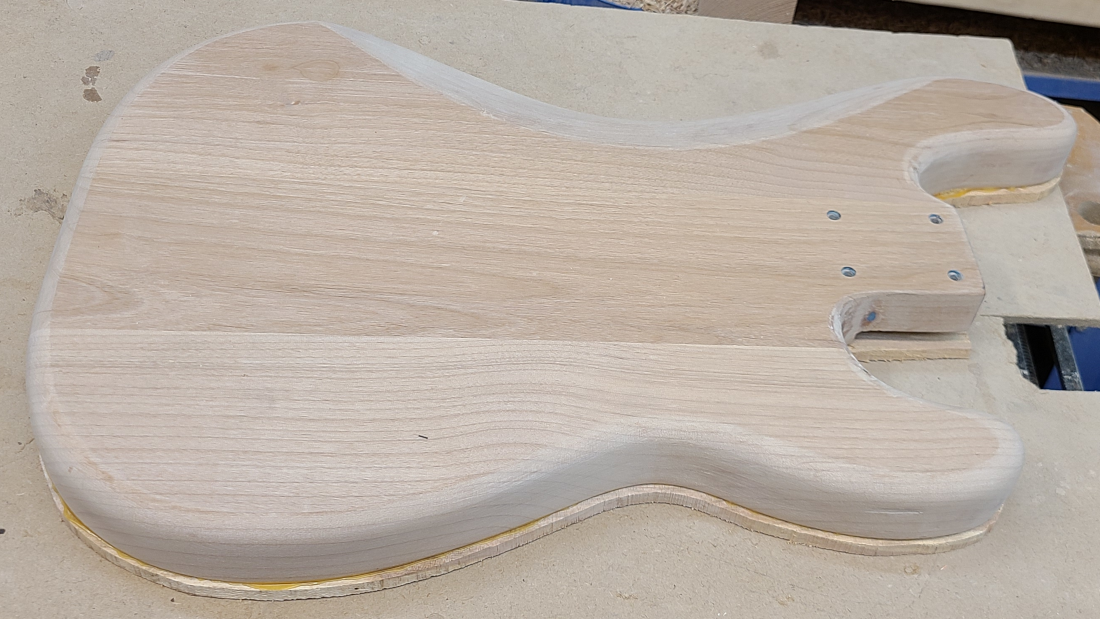
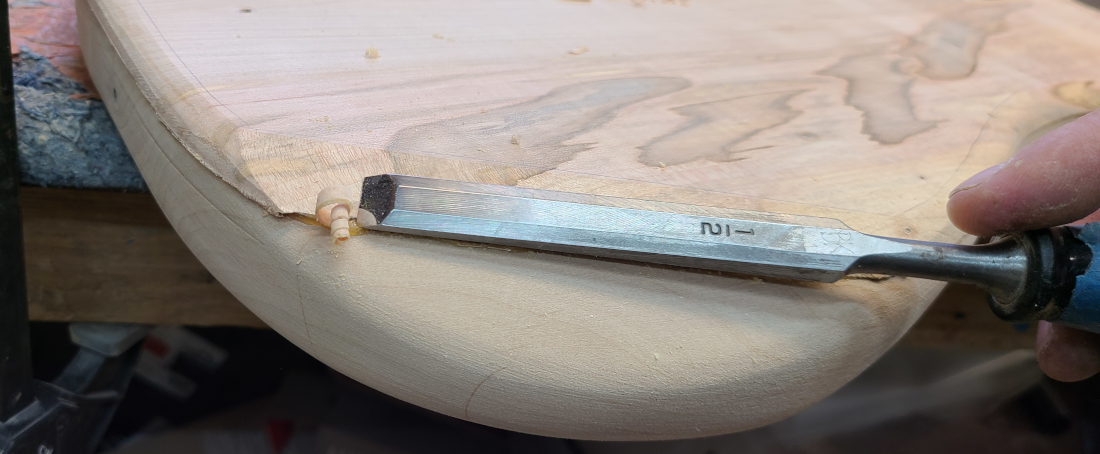
Finally it is shaped with a very sharp chisel, before being cleaned up with sandpaper.
The gaps are pretty much gone after sanding.
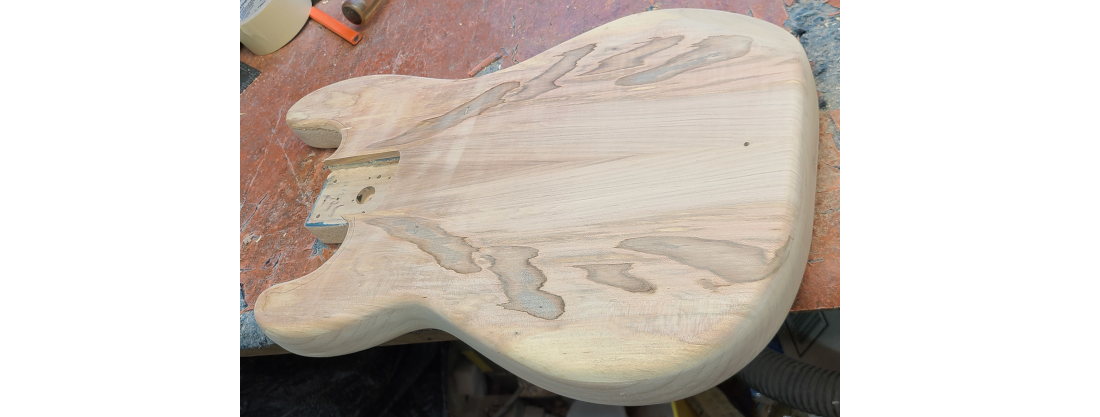
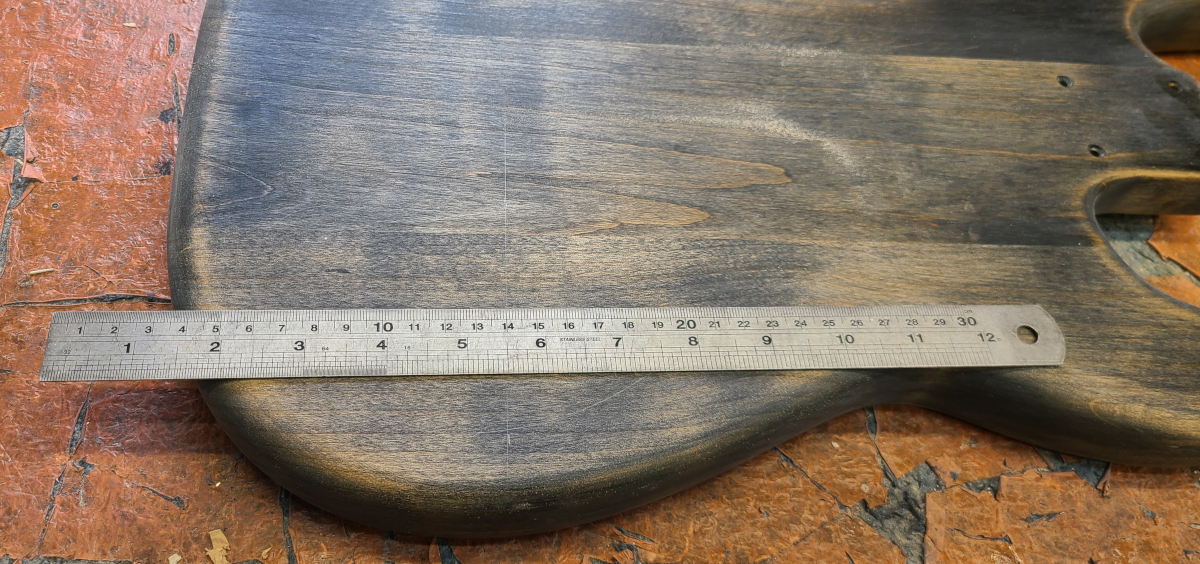
The shaping is finished, and now the body will be sanded down to 220-grit, in preparation for the finishing process.
The electronics cavity routing will be done later, just before finish is applied, to make the sanding process go smoothly.
Water is sprayed onto the body, so it evaporates and raises the grain in the process.
After the body dries, the pore filler is applied, and left to dry overnight.
The body is once again sanded out to 220-grit.
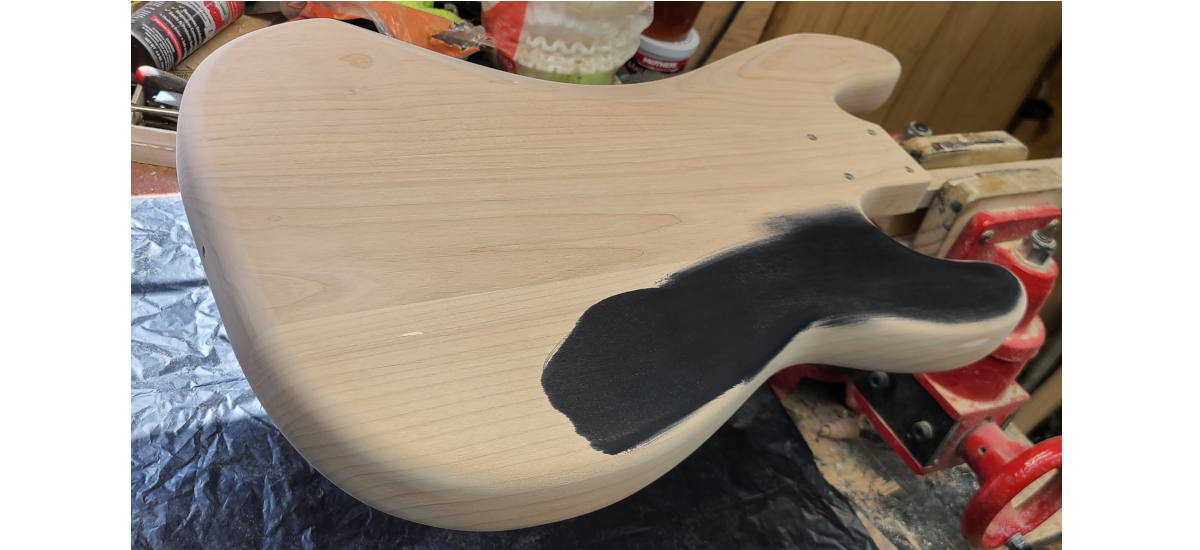
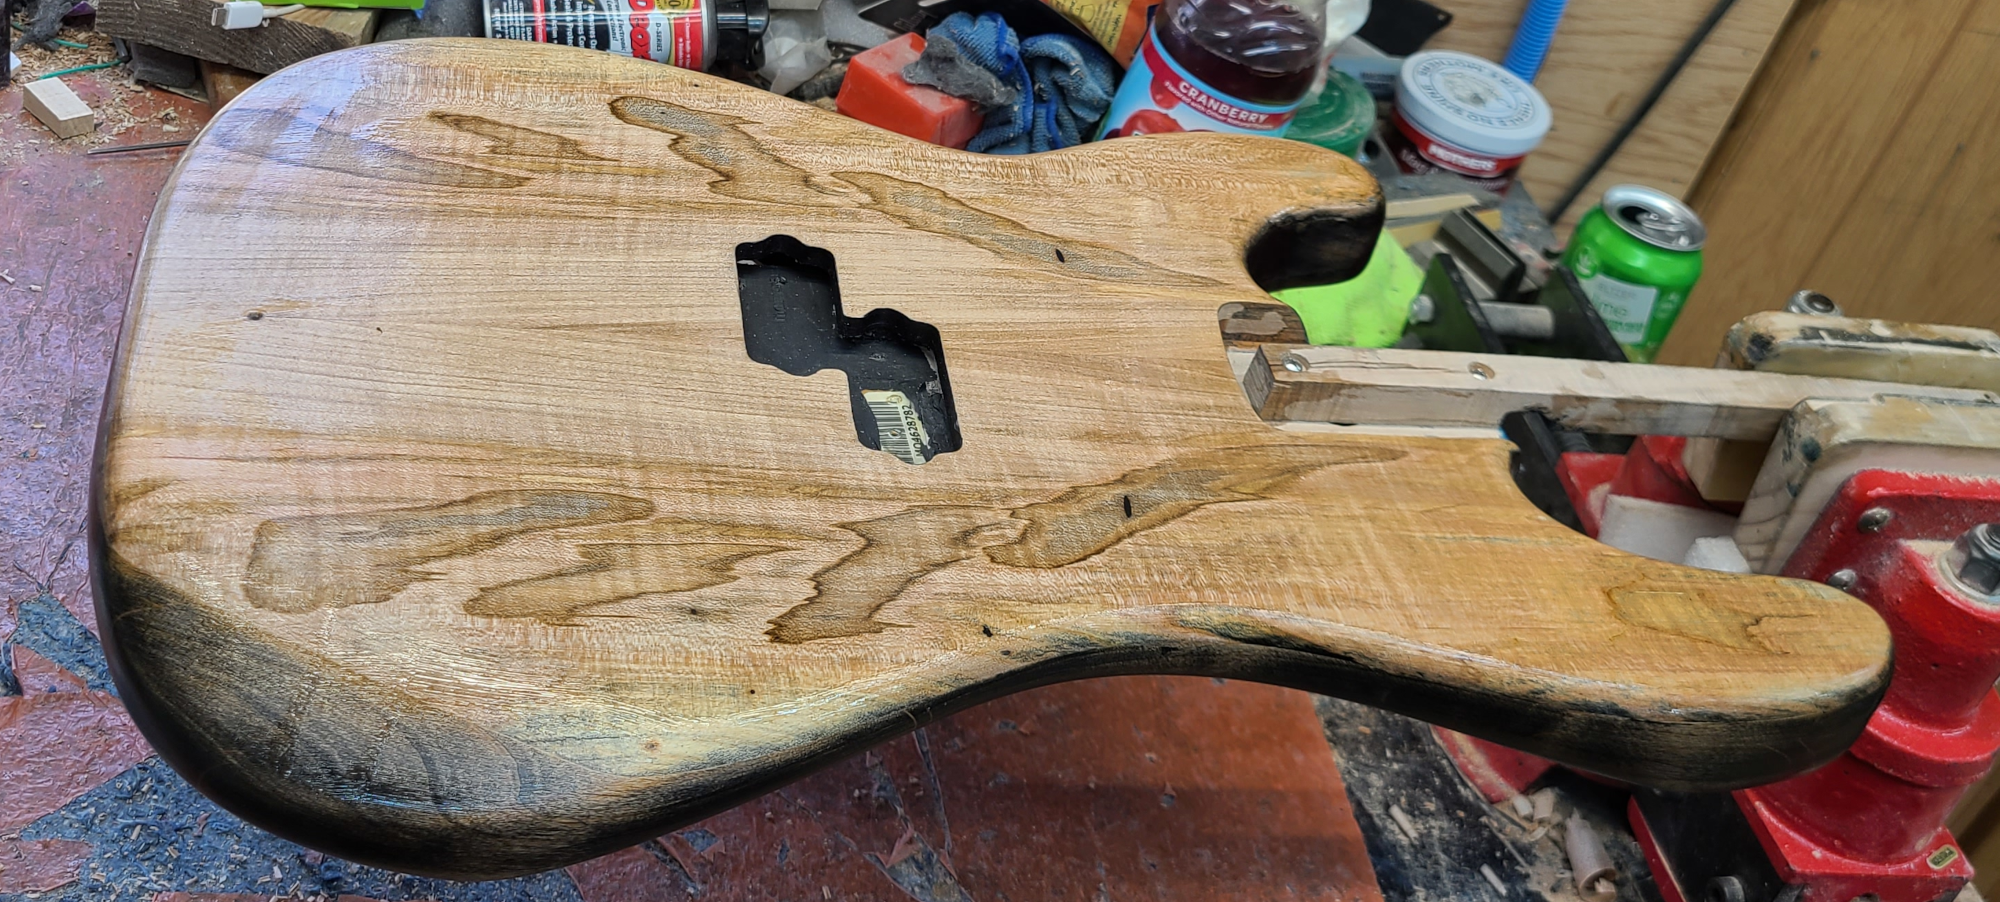
Starting to apply the black leather dye.
The dye is applied and evened out.
Now it will be left to dry for several hours before being sanded back.
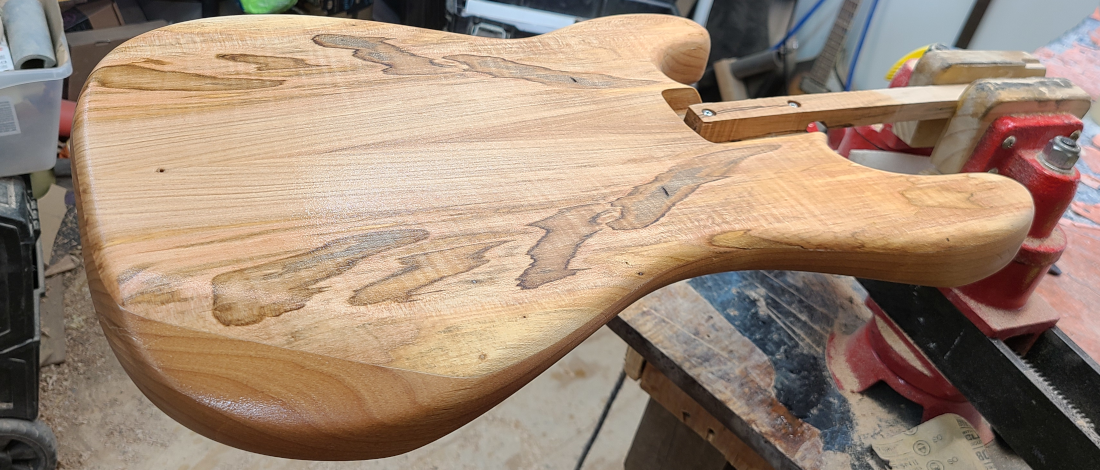
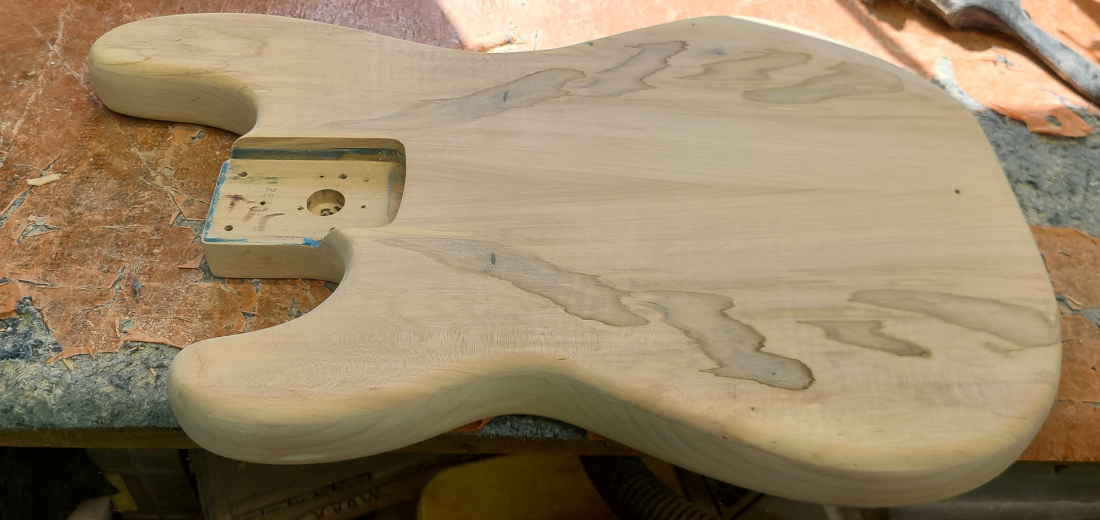
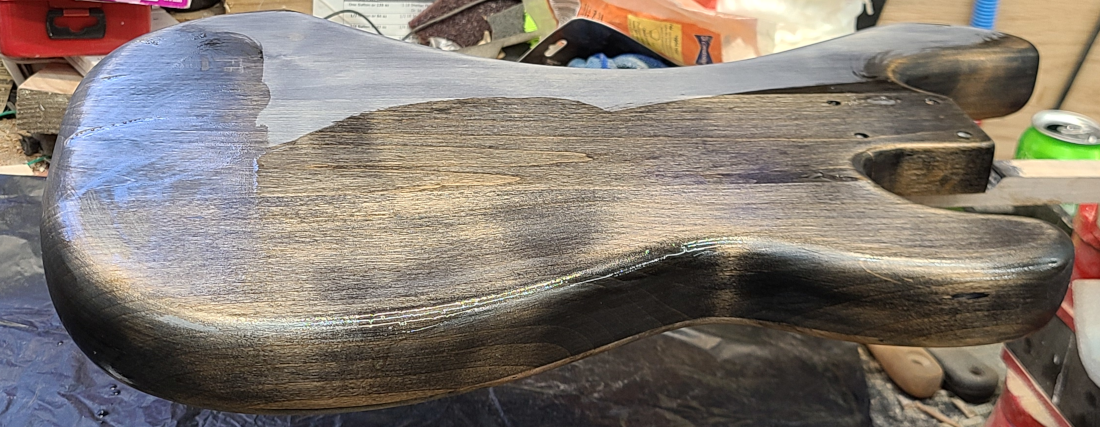
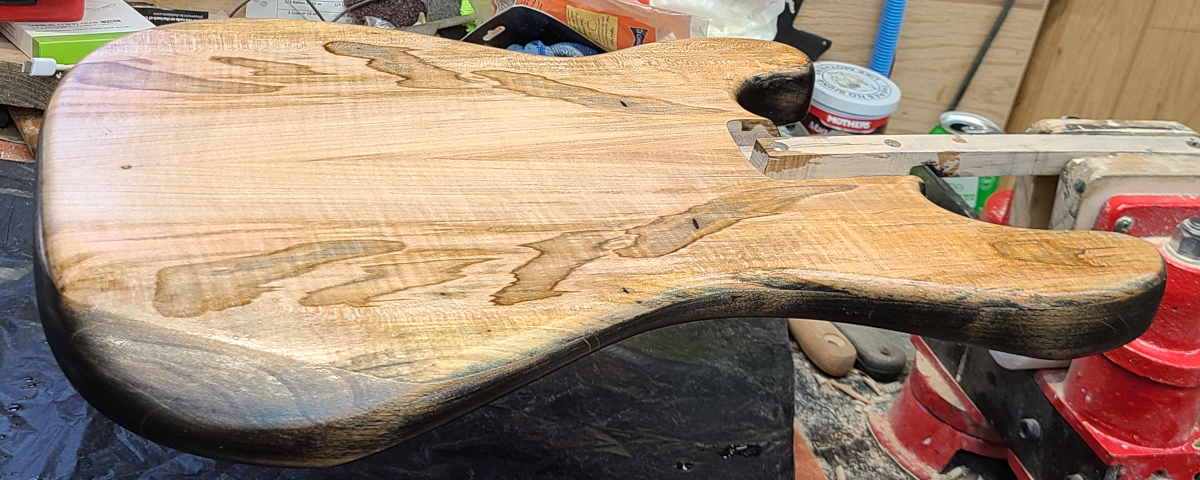
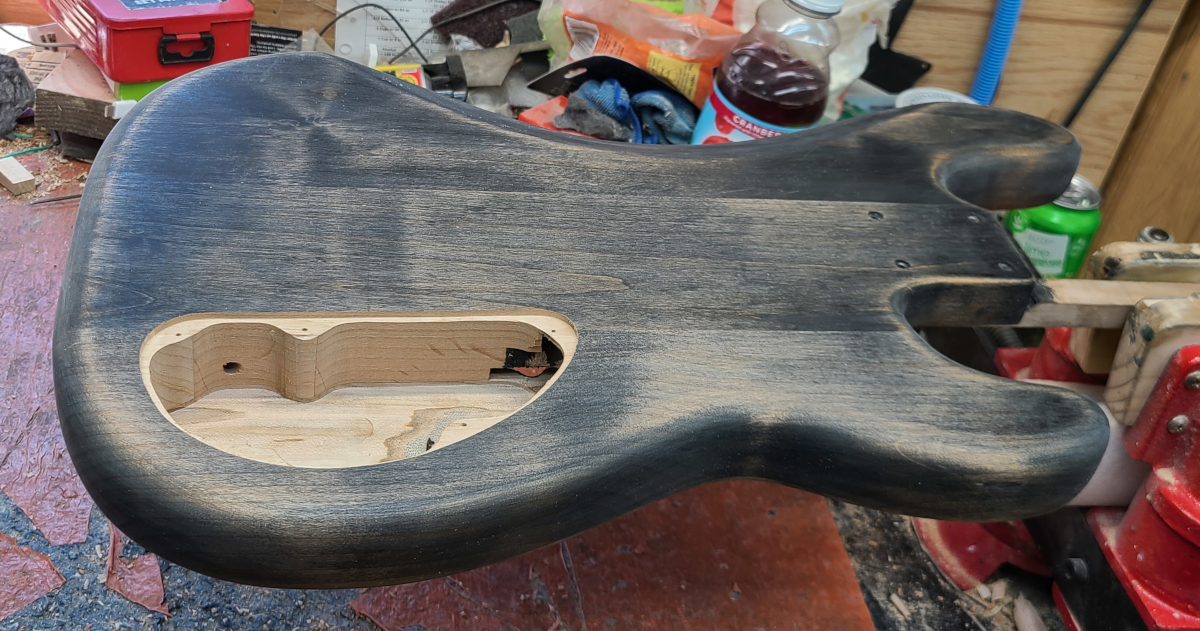
The black is sanded back with 150-grit, and butcher block oil is applied as a sealer.
Notice the difference in wood, during the application process.
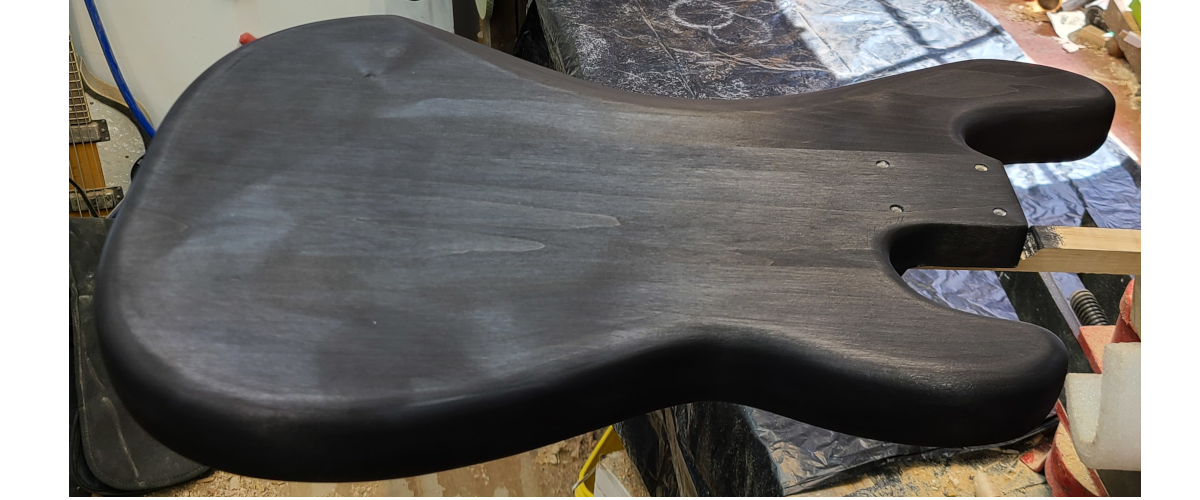
The sealer coat is on, now something closer to the finished product is visible.
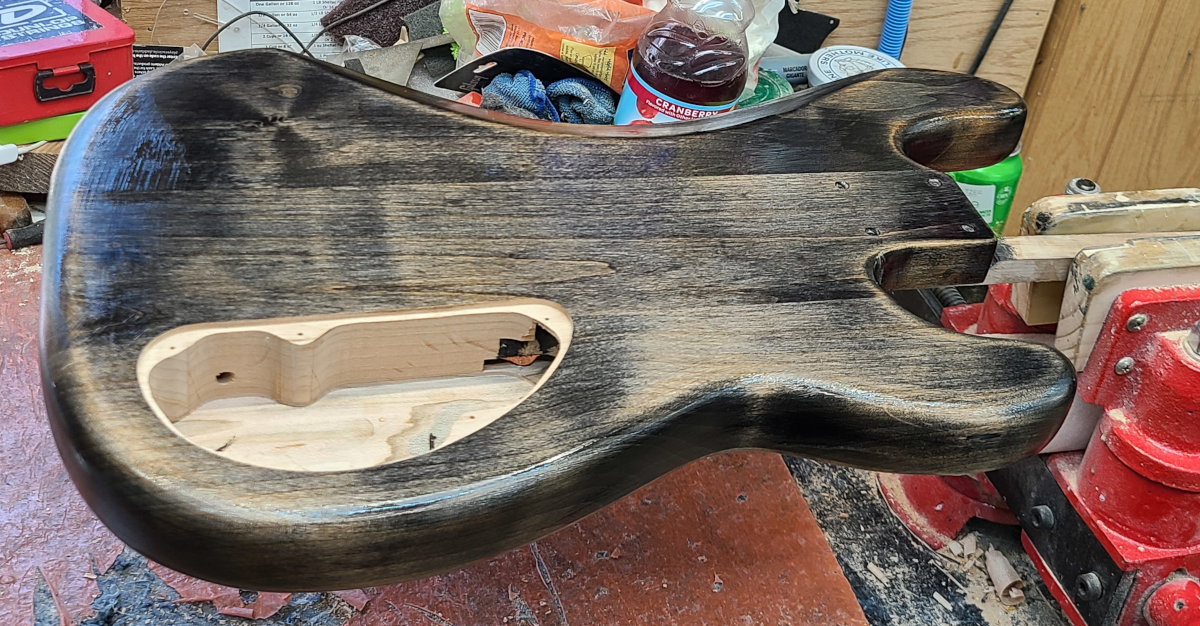
The color was feathered towards the top.
It would be a travesty to obscure the maple cap, so the black pigment was only applied to the alder.
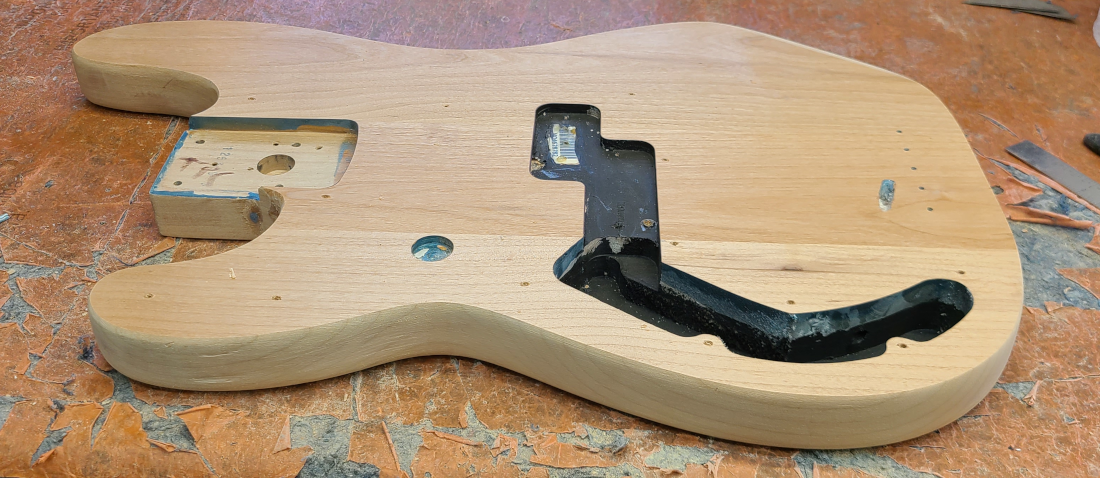
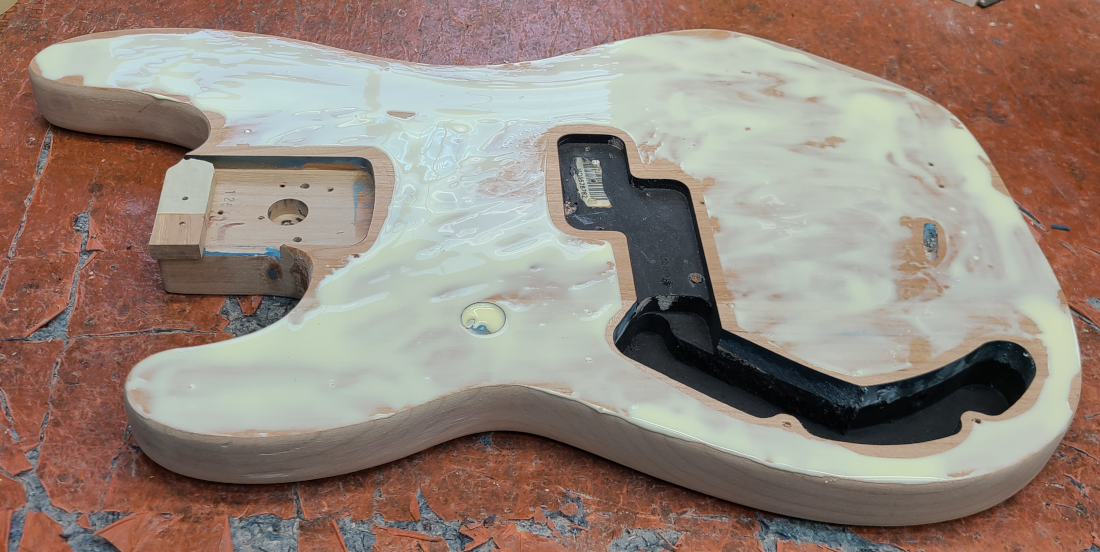
Next up, I will route the control cavity.
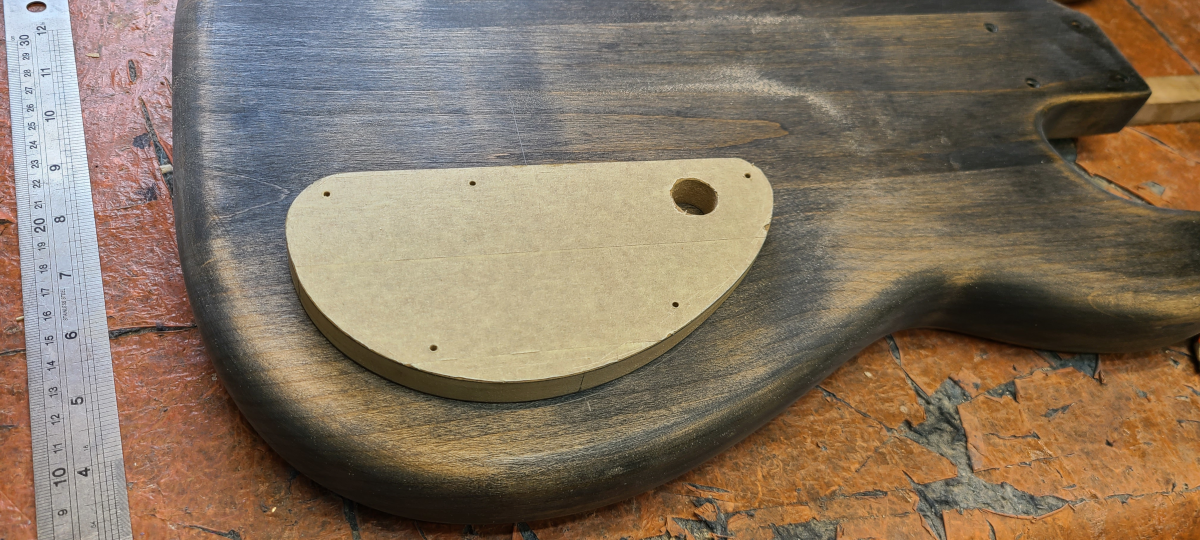
Previously the cavity was top-routed, but since it’s getting a maple cap, the access will now be through the back plate, and the controls will mount to the top cap, instead of through the (now omitted) pickguard.
First, the plate template is placed on the back face of the instrument, and the horizontal/vertical centerline points are transferred from the MDF to the body.
Then the centerlines are drawn, in preparation for the incoming routing template.
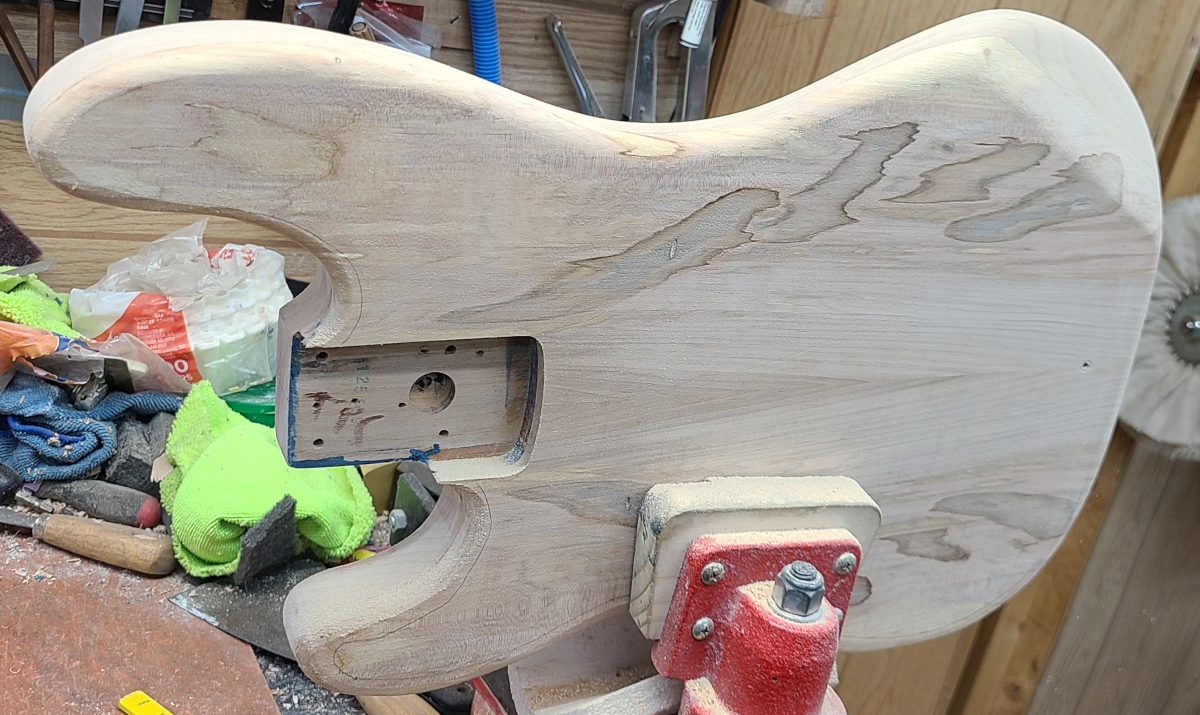
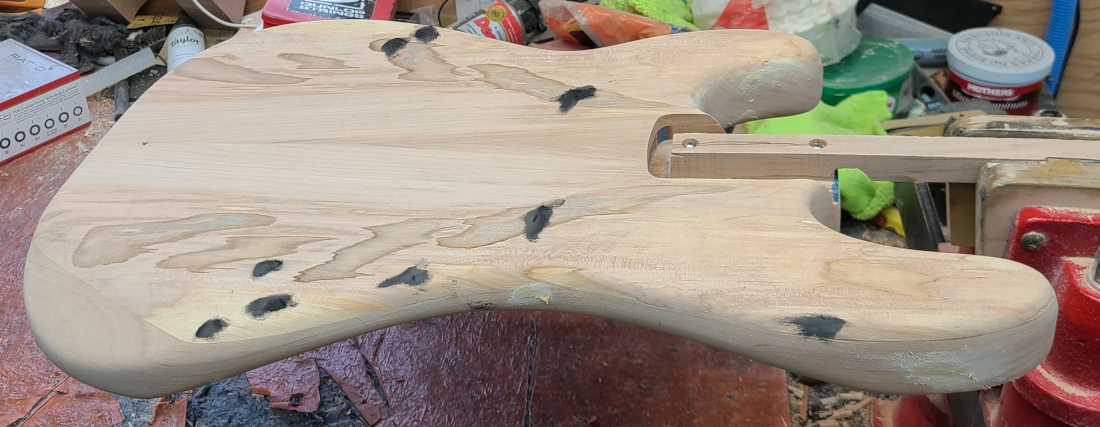
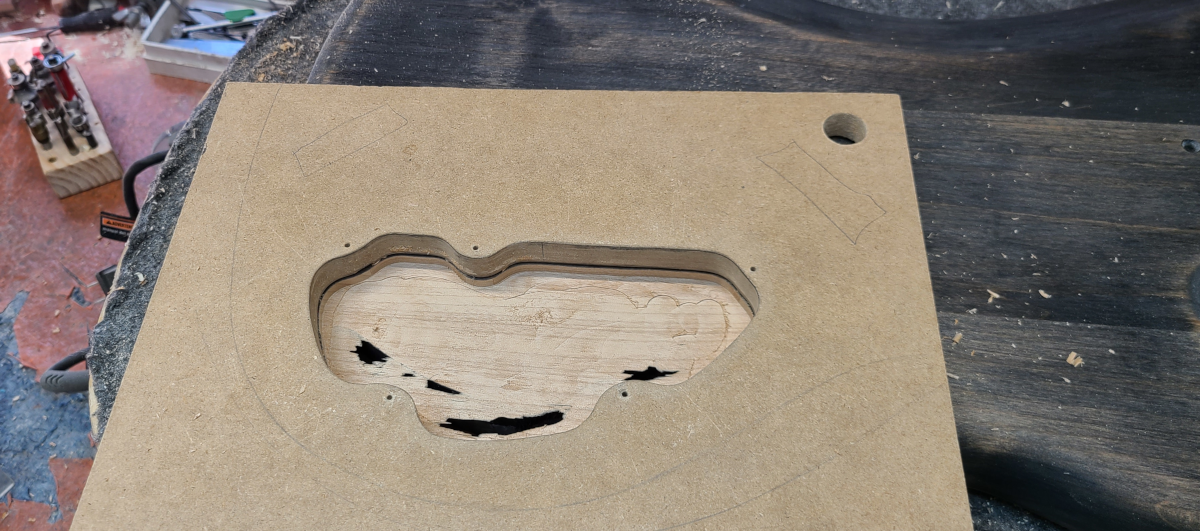
The main cavity routing template is attached with double-sided tape, lined up with the previously drawn centerlines, and the routing is started with a bearing-flavored router bit.
In the pic, the black spots are where I broke through to the existing cavity.
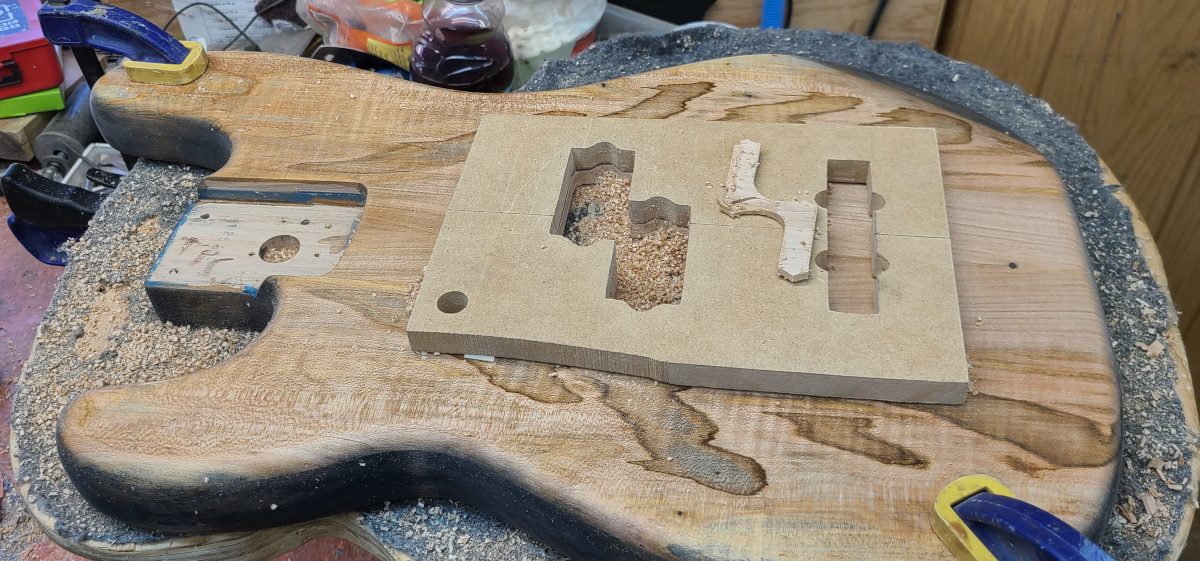
Next the body is flipped over and the pickup template is placed in the center, along the bookmatch seam, and halfway between the 34" scale length bridge location and the start of the neck pocket.
It is then routed just deep enough to get through the cap, since the body is already routed from the factory.
Then the negative-cover template is centered over the previously-marked lines, and routed to a depth of 1/8", for the cavity cover.
With all the cavities routed, finally it is time to apply the finish.
Notice the differnce in contrast after just one coat, compared to the previous picture.
The finish will bring out the flaming of the cap, as well.
The finish process for the body will take about a week, and requires a lot of waiting for finish to dry, so in the meantime I will get started on the neck.
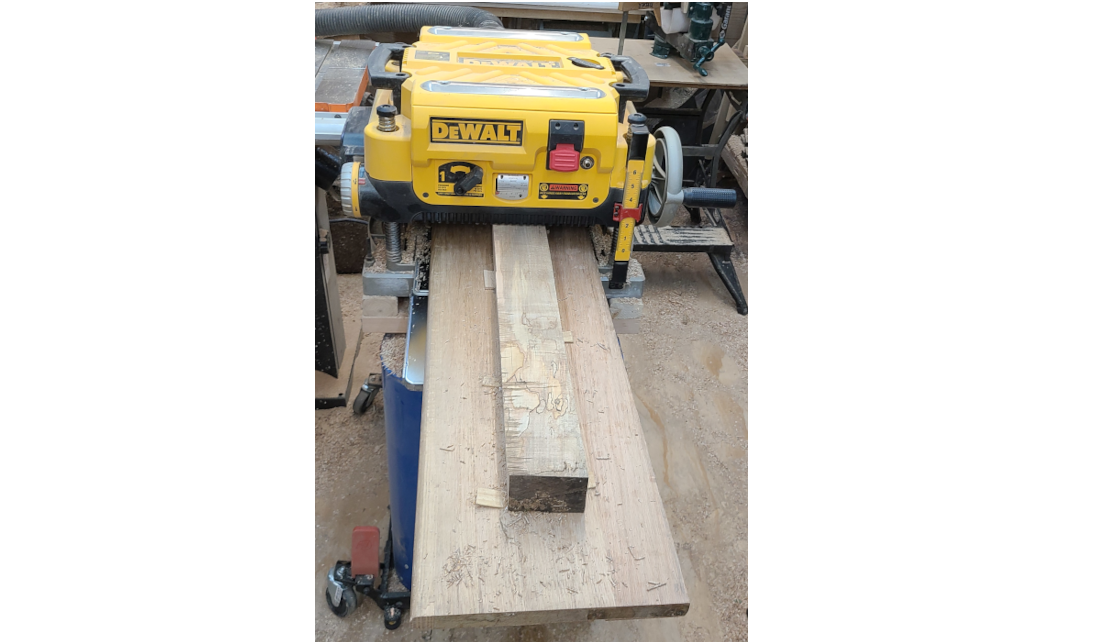
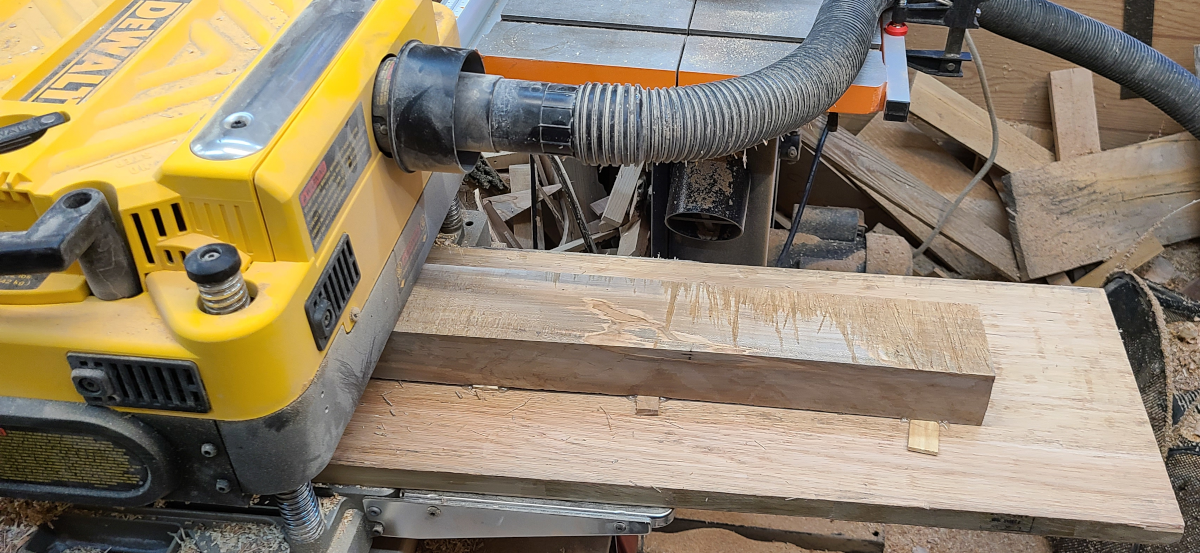
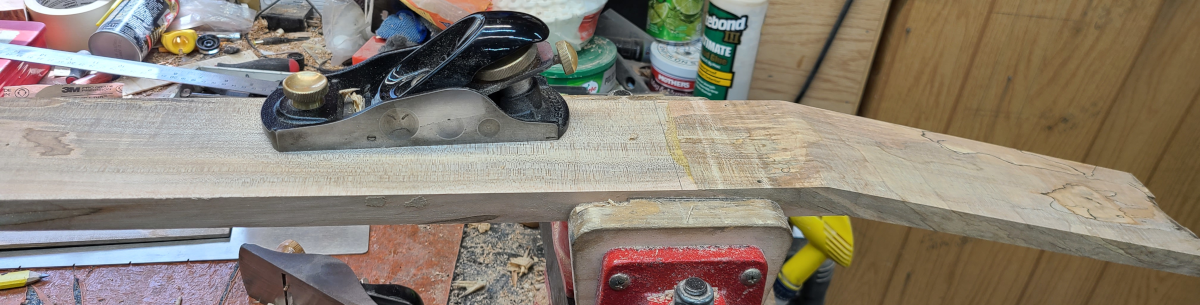
This particular maple quartersawn neck billet was milled about a year ago, and is now being planed flat and straight.
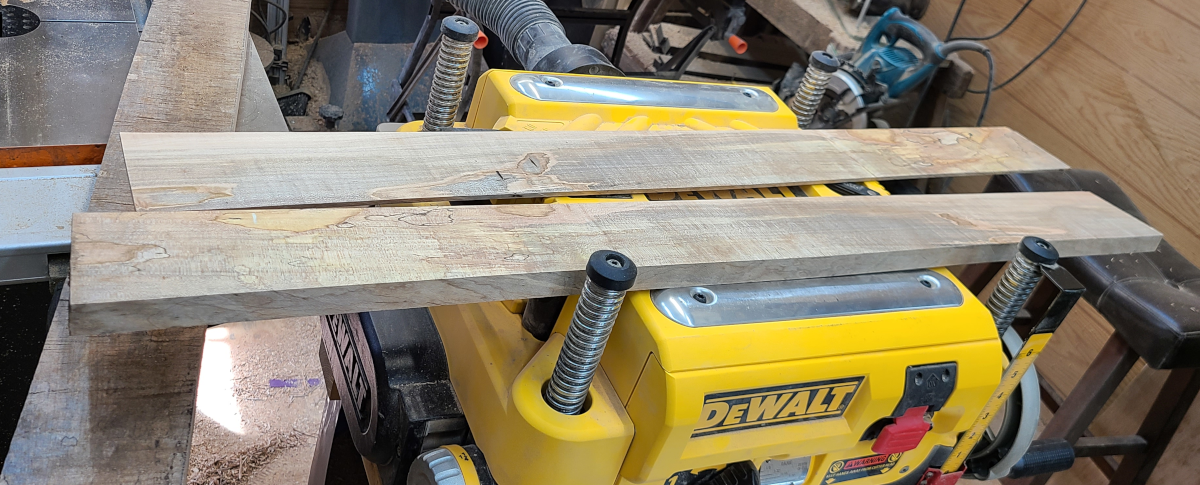
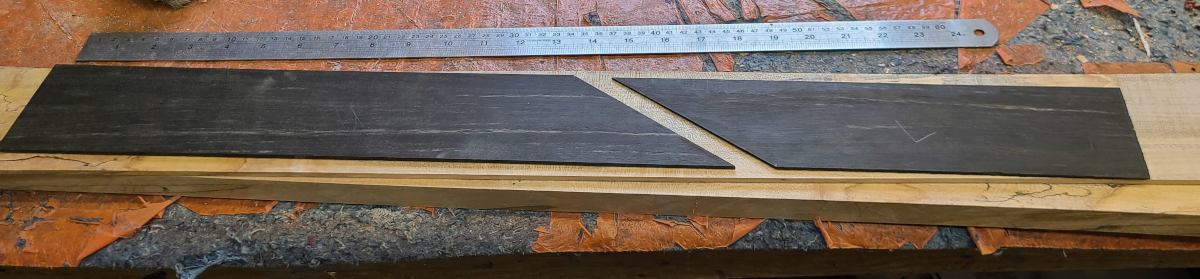
After all sides are straight and true, the billet is resawn at 1" for the neck blank, and 5/16" for the fingerboard blank.
The blanks are then sent once again through the planer for a final thickness of 3/4" for the neck, and 3/16" for the fingerboard.
Next a piece of ebony is ripped down to 1/8" and glued to the bottom of the fingerboard blank.
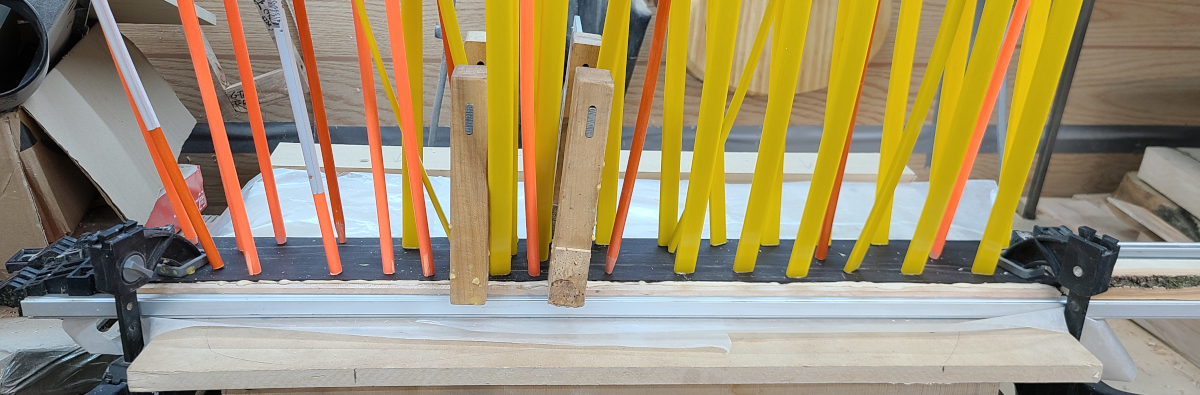
The ebony piece is then glued to the fingerboard on the gobar deck.
Lots of gobars are used to spread the pressure evenly.
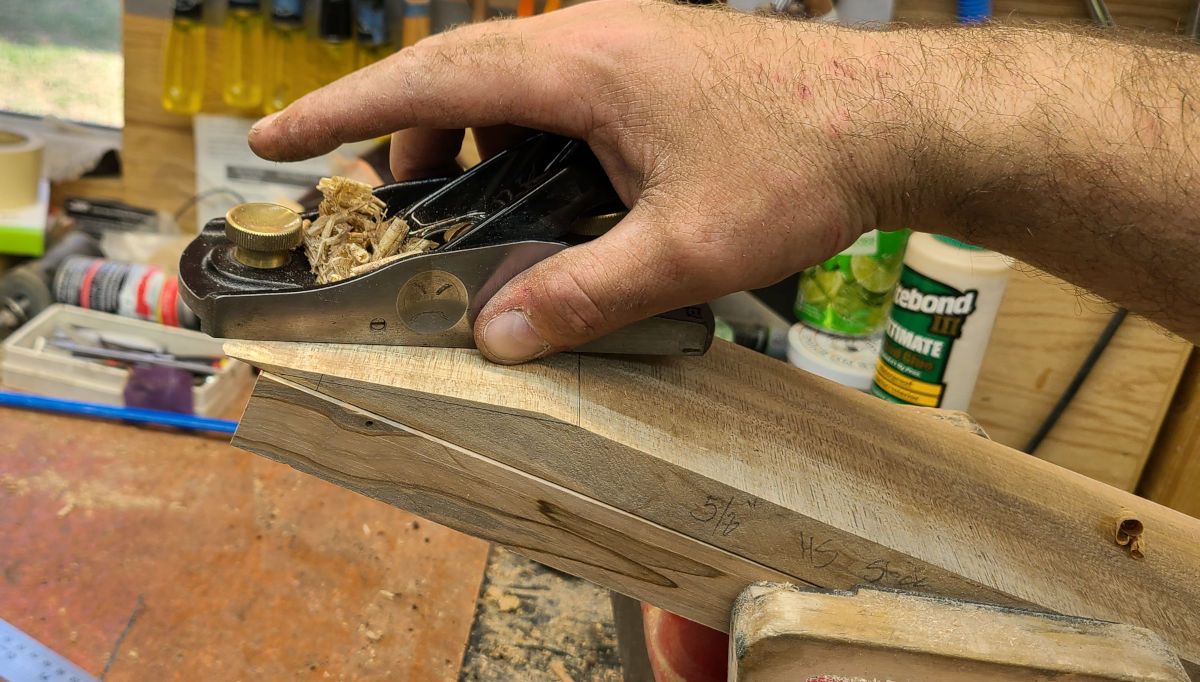
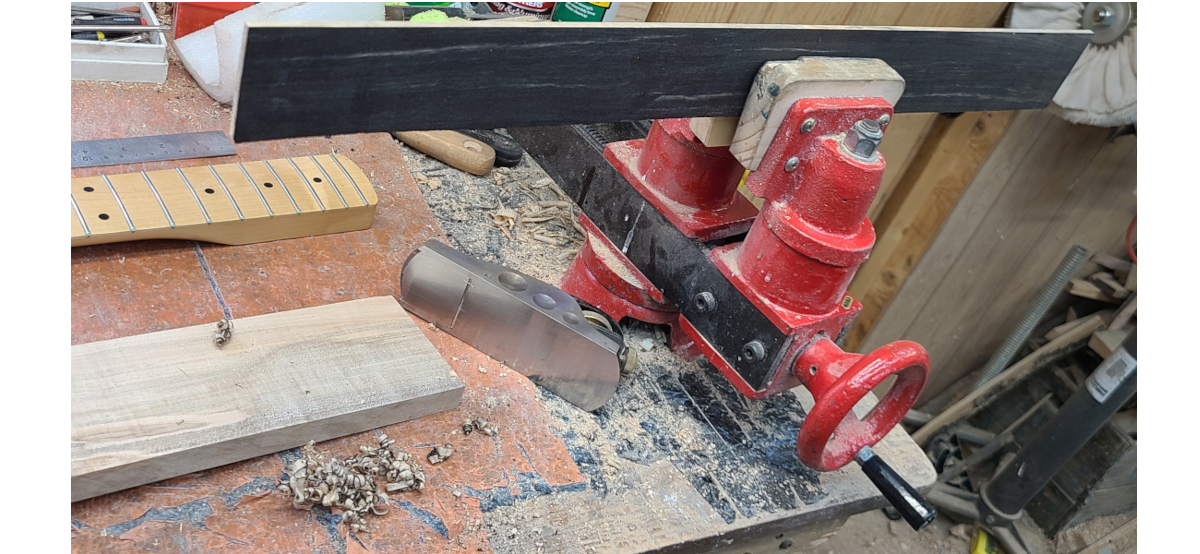
While the fingerboard is drying, I start planing the scarf joint for the headstock, at a 13 degree angle.
Which is then glued, pinned and clamped in place.
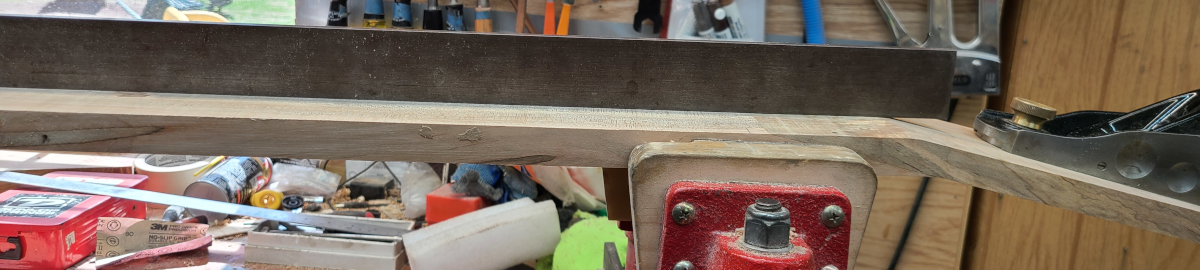
The following day, the fingerboard is unclamped, and the edges are trimmed up with the block plane.
As is the scarf joint on the neck.
The block plane produces a very even, flat surface, with minimal effort.
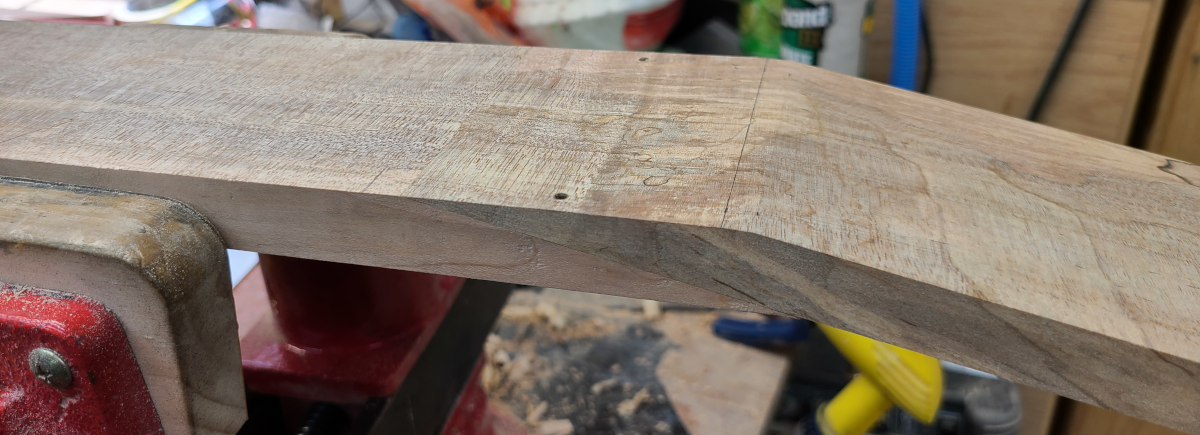
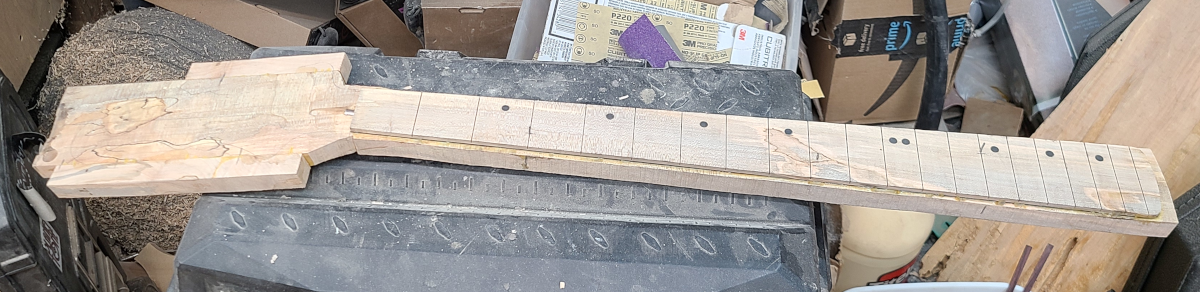
Next a line is marked at the transition from the neck to headstock.
This line will denote the edge of the nut, and the fingerboard will start 1/4" behind.
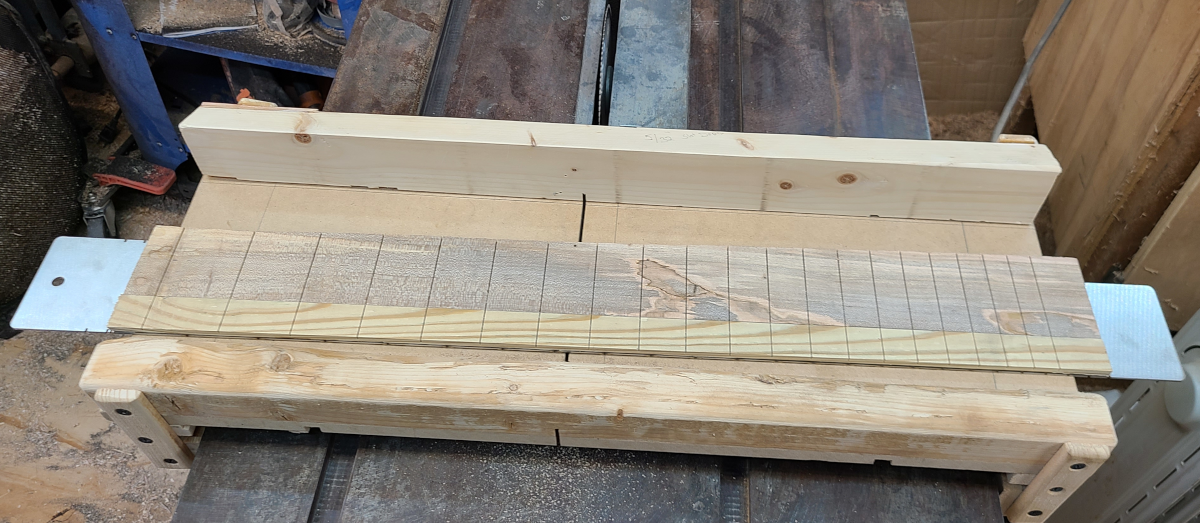
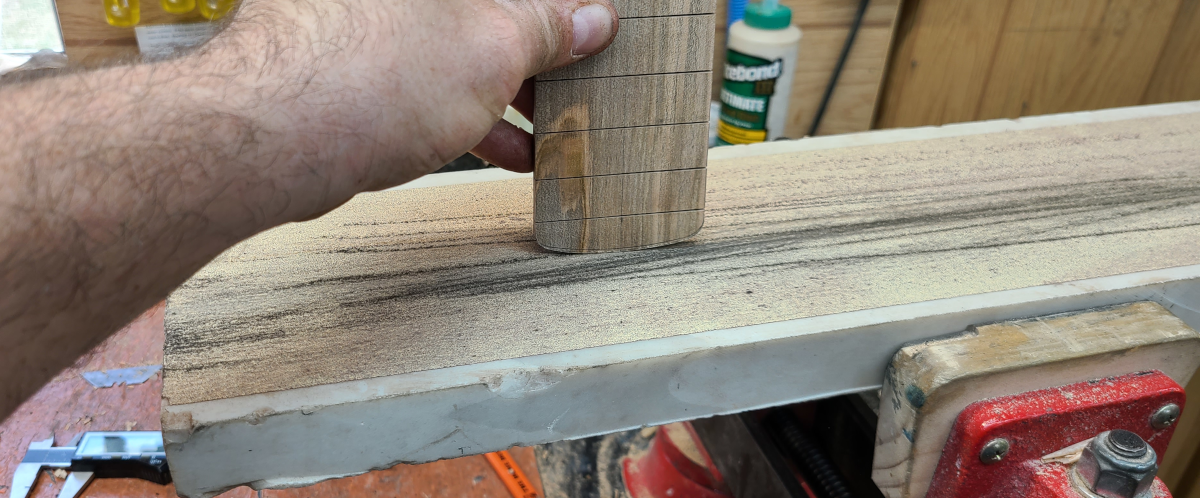
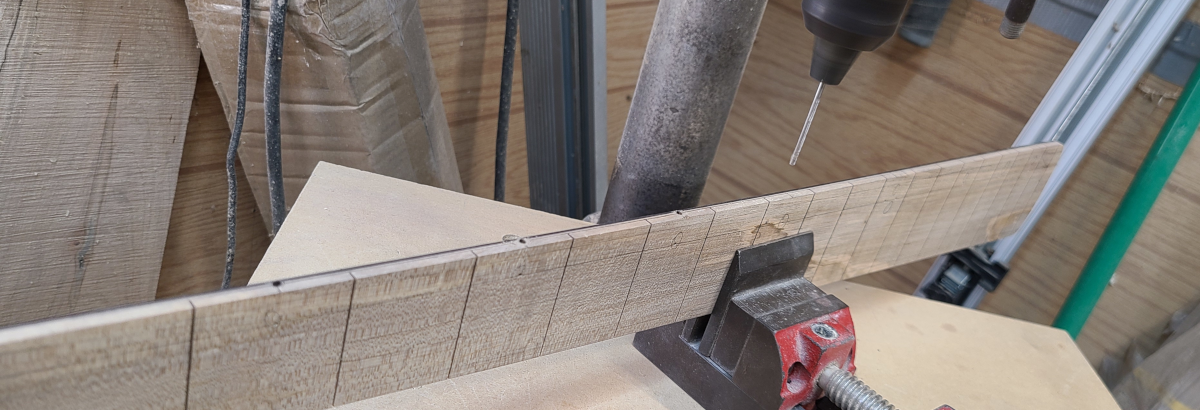
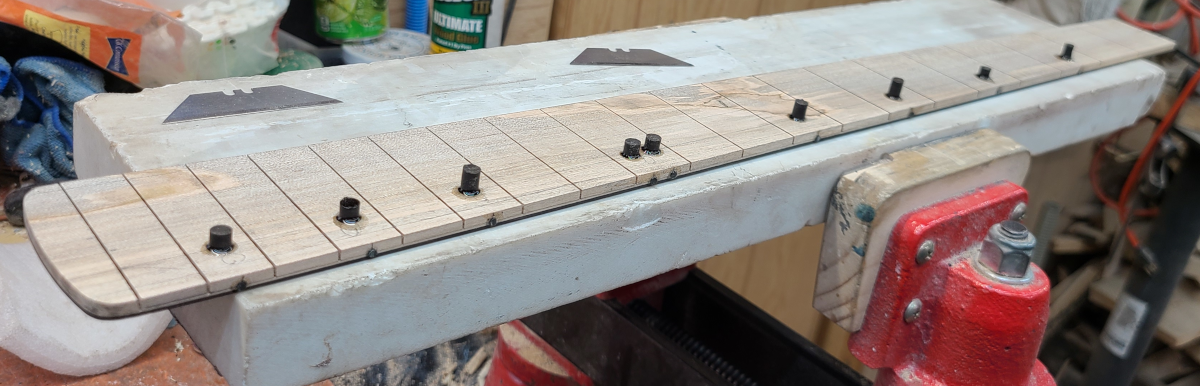
Now the fretboard will be slotted.
I had to add a shim beside the board to make sure the slots run parallel to the grain – but this isn’t a usual occurence.
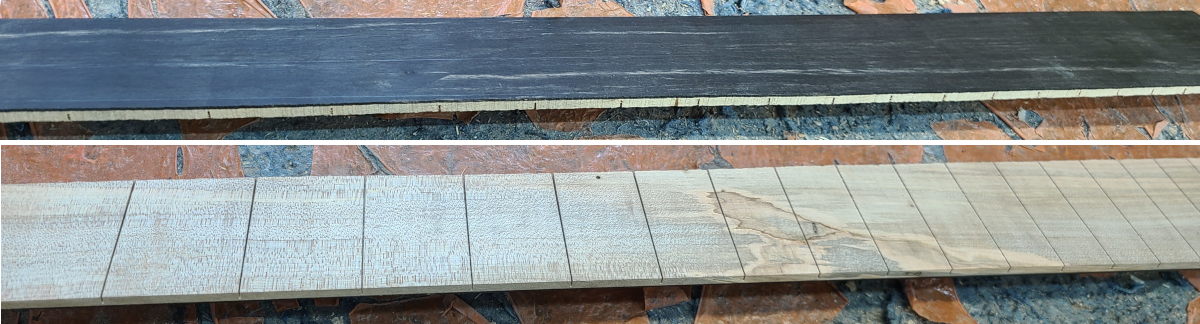
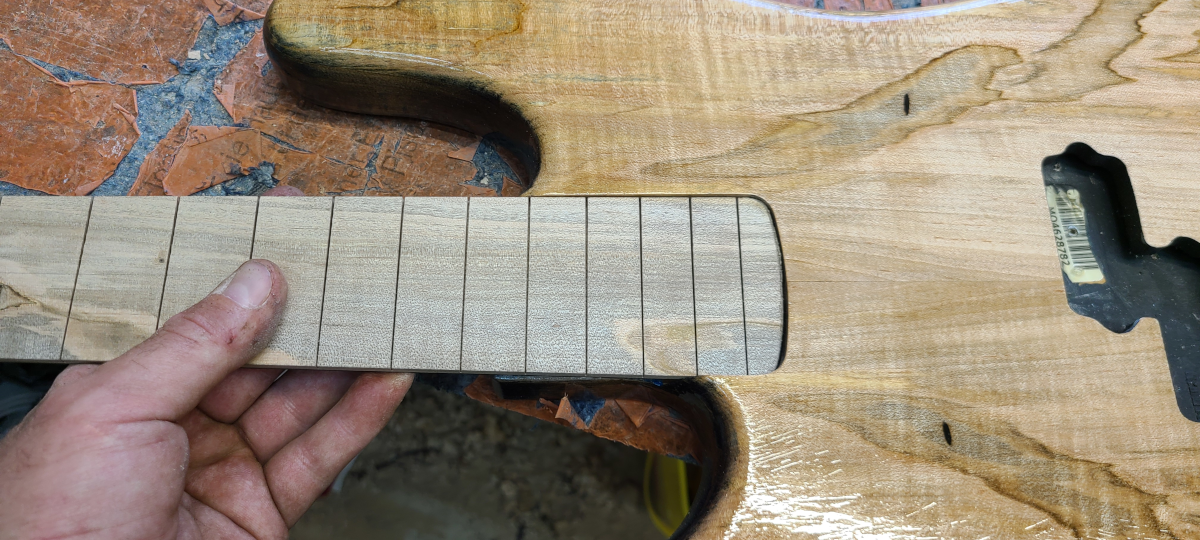
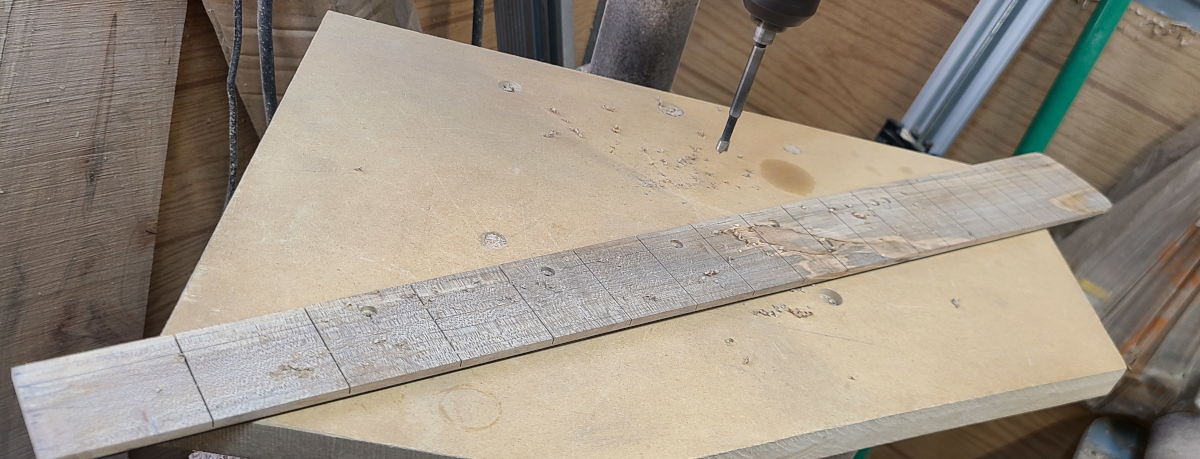
The top and botttom faces of the board.
The 60 degree seam in the ebony is hardly visible now.
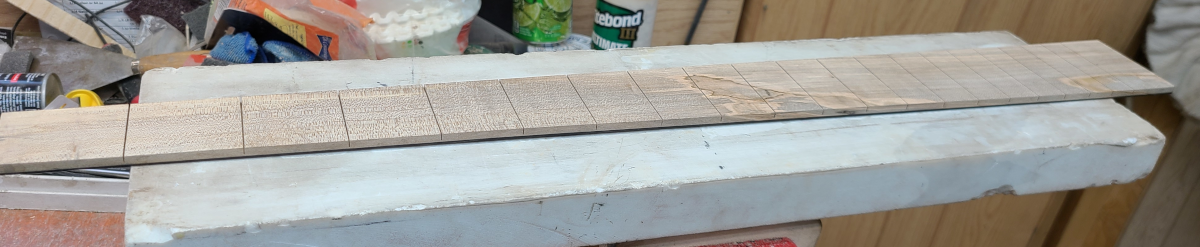
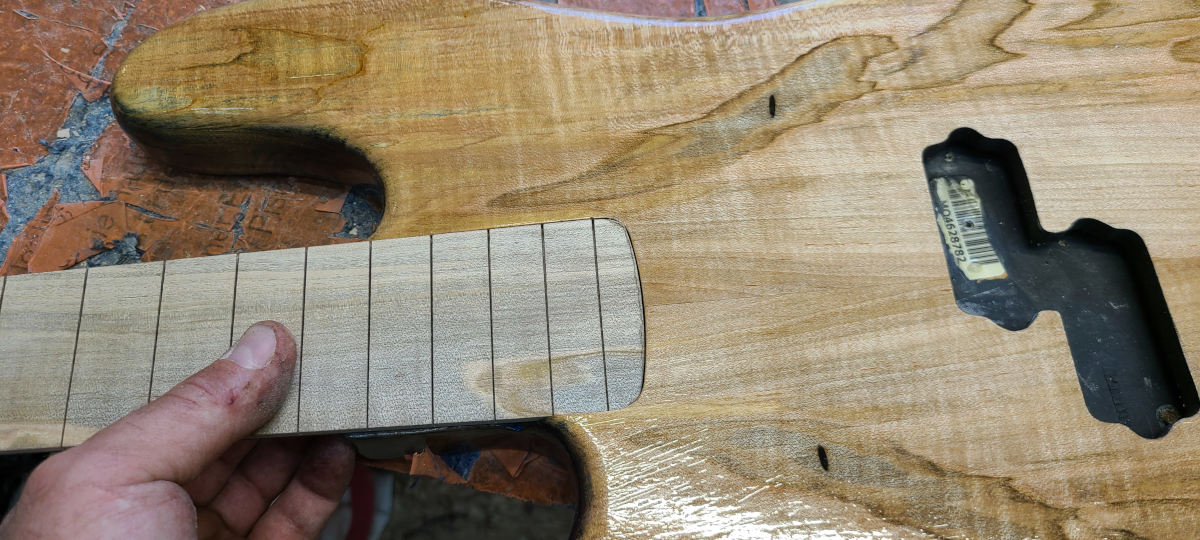
The board is then tapered to size.
Now for the heel area, which it is very important that the heel of the fingerboard fits into the neck pocket as tightly as possible, since the neck will get routed to this shape after the board and neck stock get glued together.
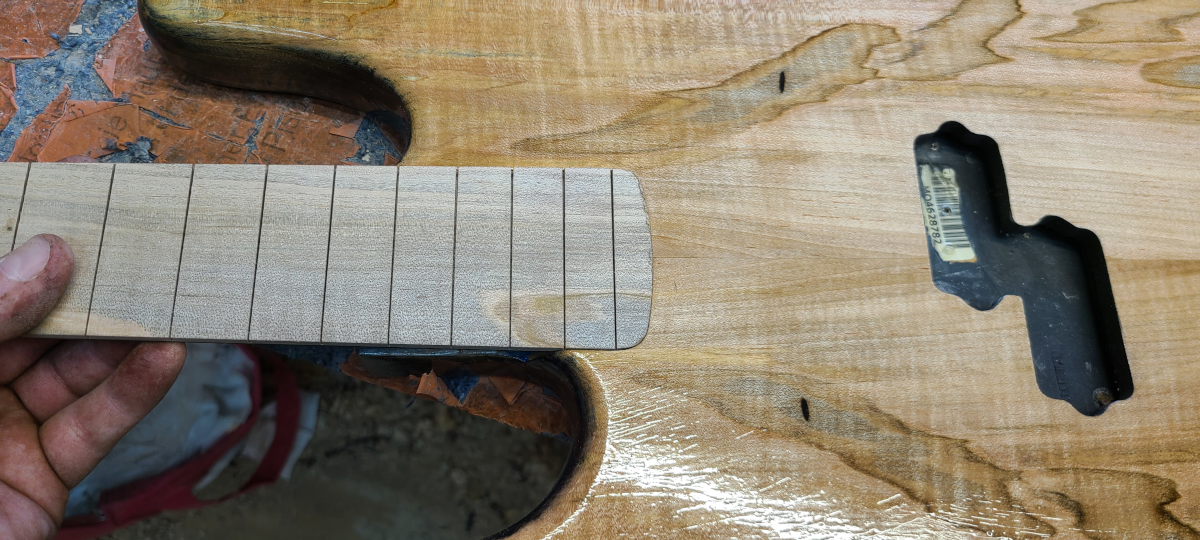
There’s still a pretty big gap, and needs to be sanded some more.
Slightly better.
Perfect.
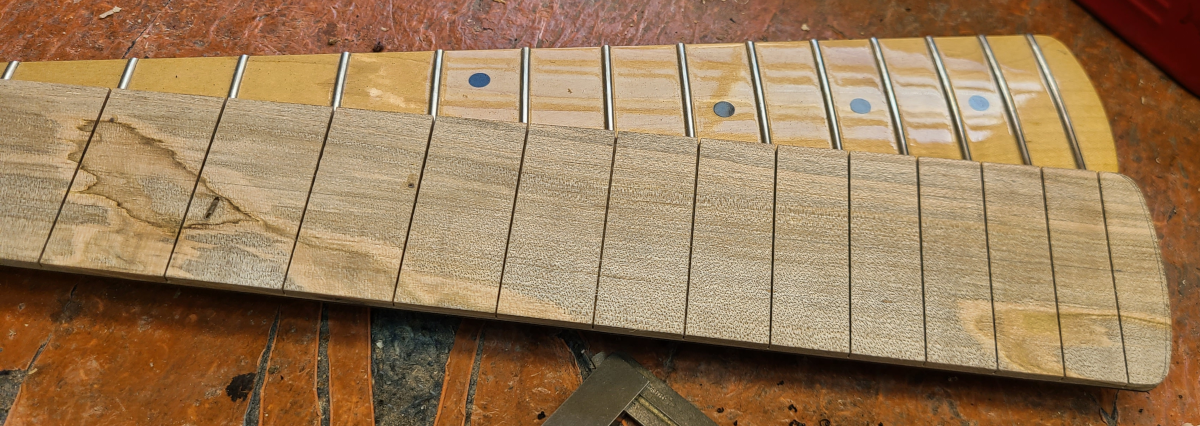
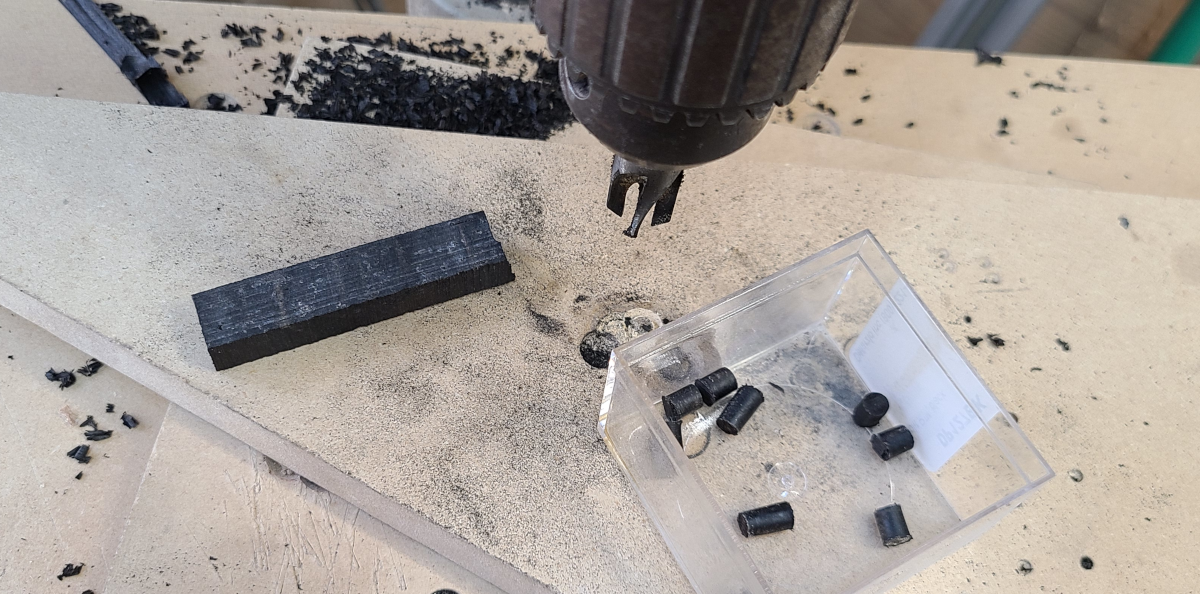
One last thing before gluing the fingerboard – the dot inlays.
Cutting ebony plugs for the dot inlays.
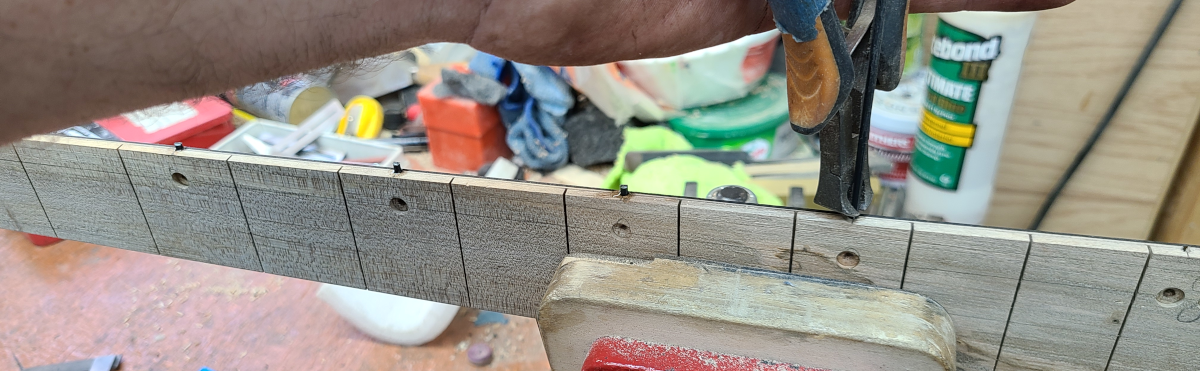
Installing the side markers, with superglue then trimming them back.
Now gluing in the face dots.
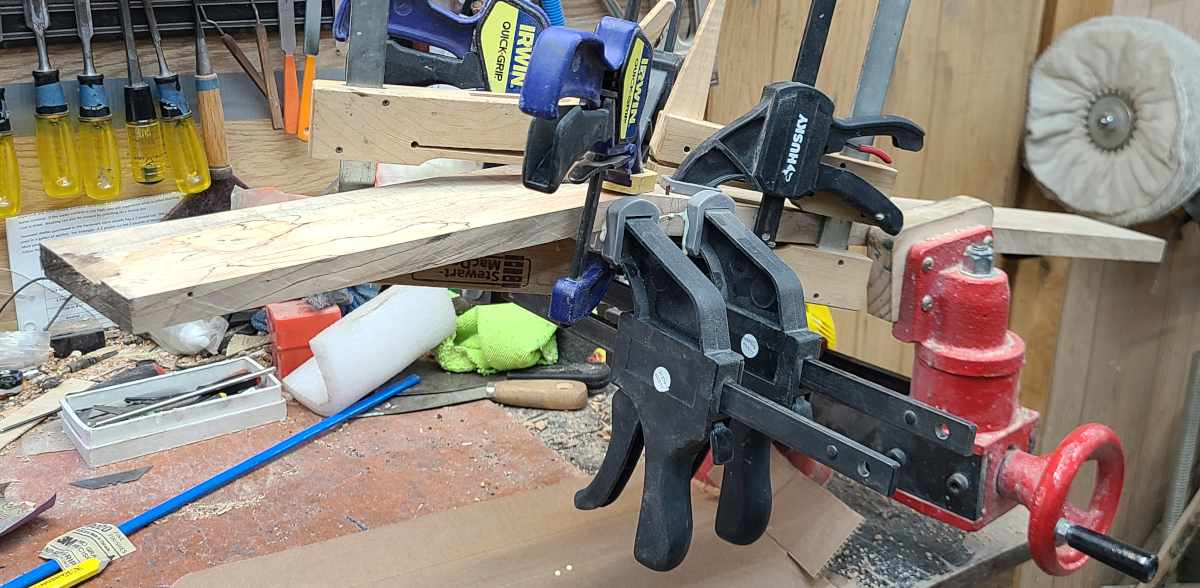
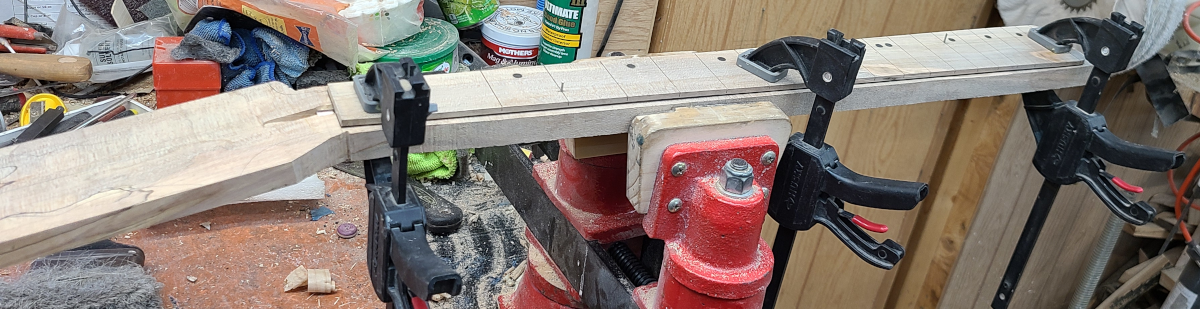
Once the board is sanded flush, it is then clamped into place and pinned, to prep for gluing.
The trussrod slot is protected from glue squeeze-out, with masking tape.
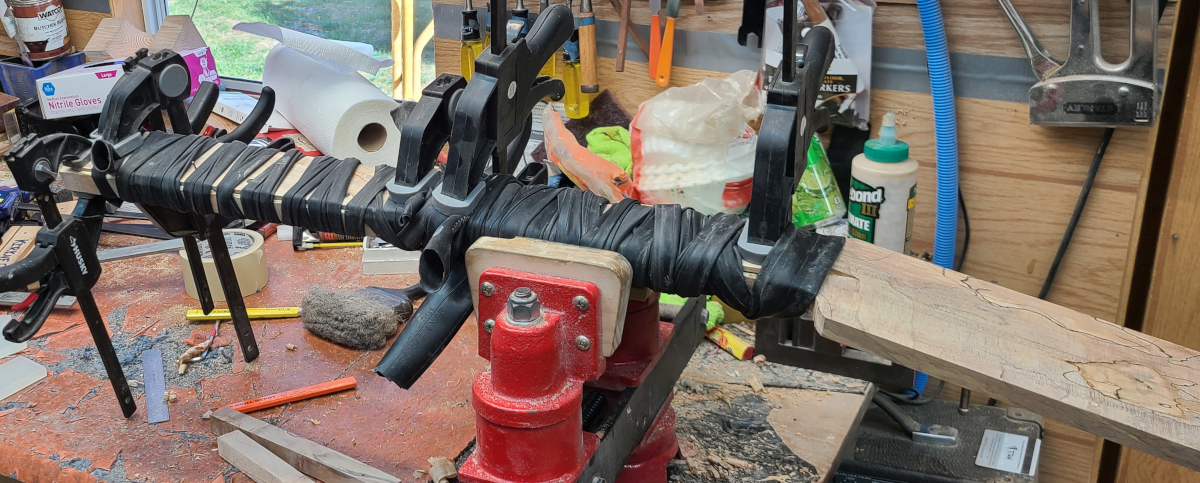
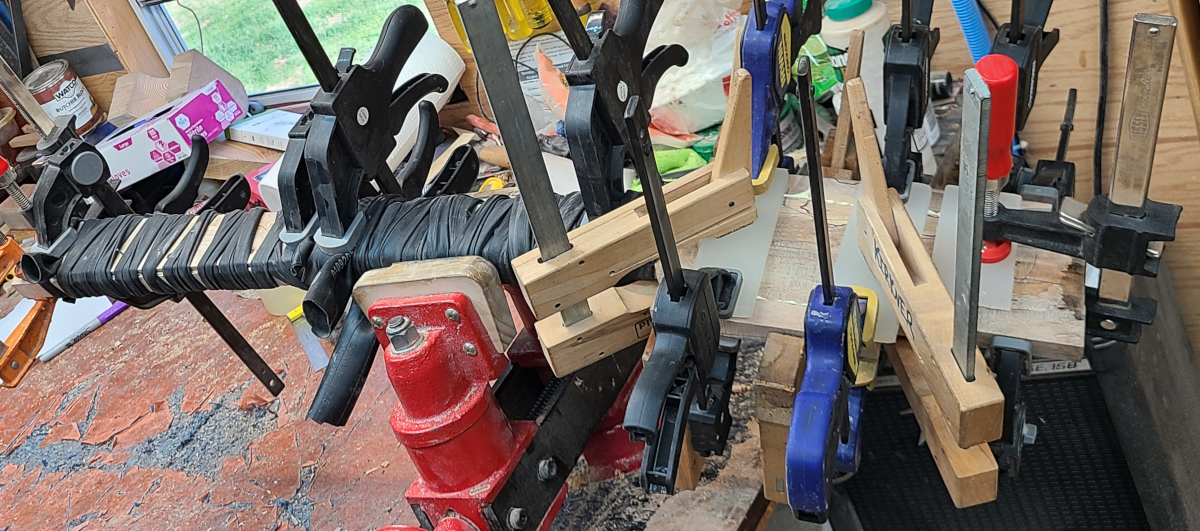
The fingerboard is glued to the neck with a bicycle innertube.
Also the headstock wings are glued up, and let sit overnight to dry.
The next day it is taken out of the clamps.
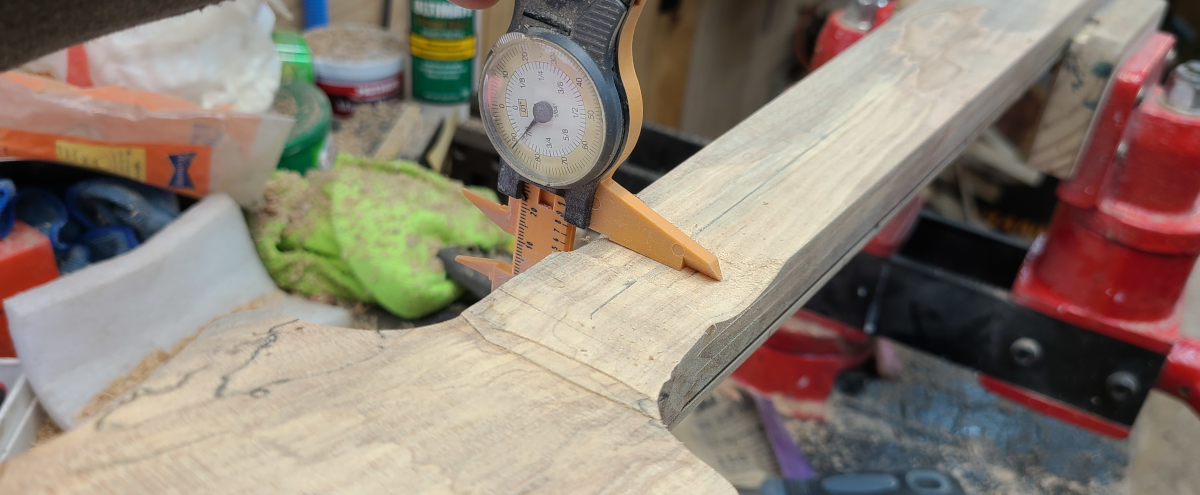
The headstock and wings are taken down to within a 32nd of an inch of the final thickness, which will ultimately be 9/16".
The remainder will be sanded out with 80-grit sandpaper.
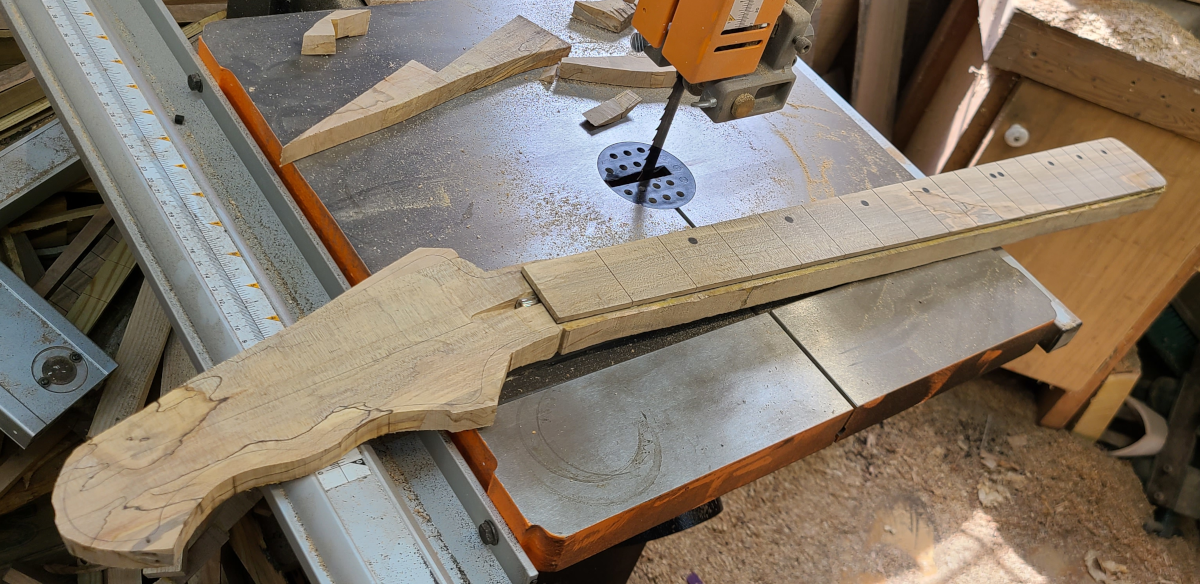
Then the rough shape of the headstock is cut out, to between 1/4" to 1/8" of the final shape.
The headstock template is then taped onto the headstock, and the final shape is routed.
Next we move on to the neck.
The router bearing rides along the edge of the fingerboard and will trim the neck flush.
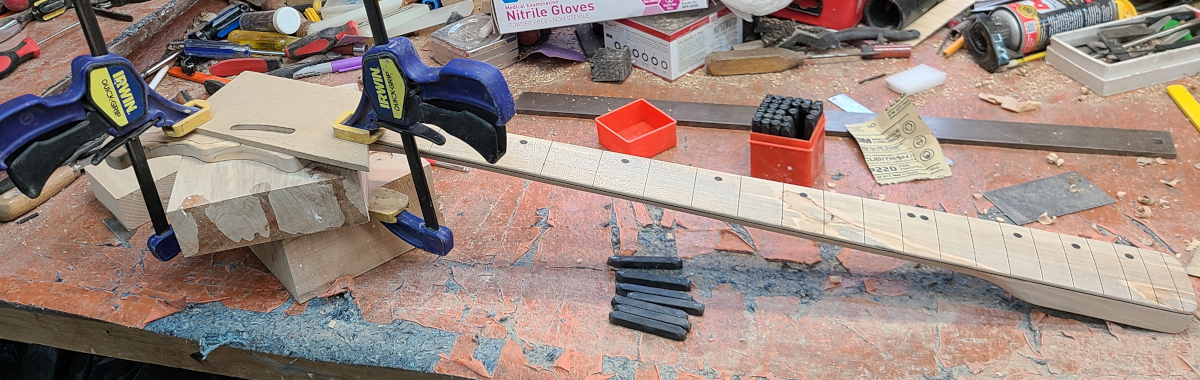
Now onto carving the neck, starting with setting the benchmarks at certain neck positions, to within 0.010" of the final thickness.
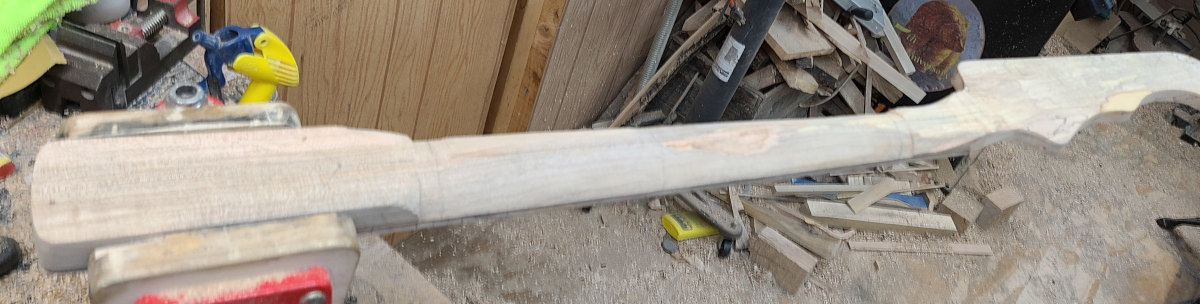
Benchmarks are done, now it’s a matter of connecting them.
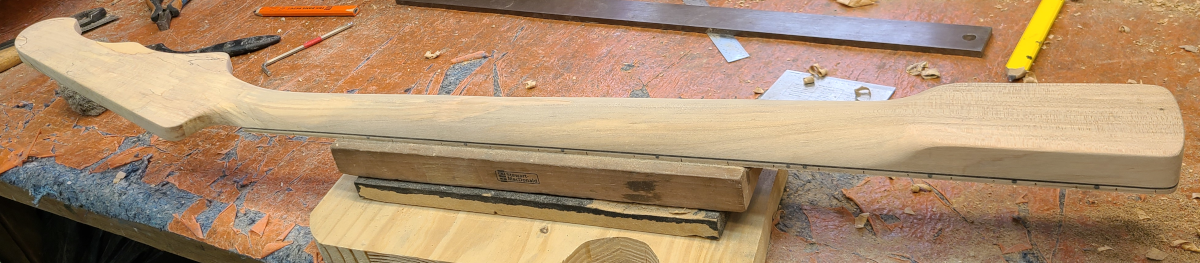
Then the heel and headstock areas are done, and the whole thing is sanded smooth.
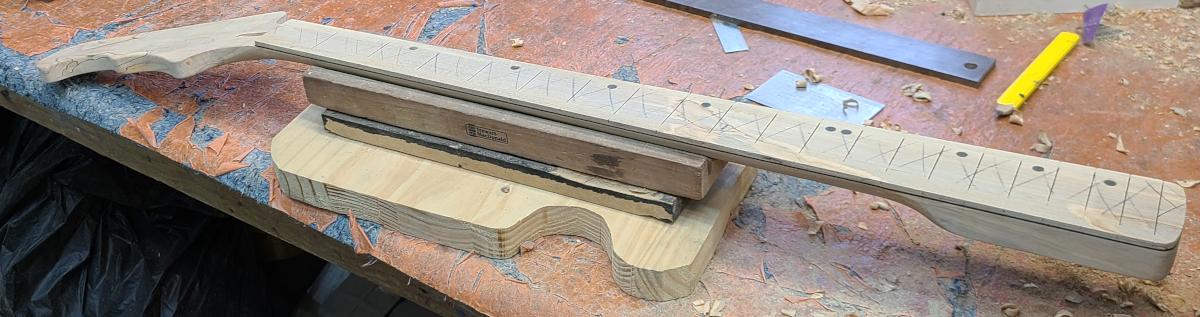
Then the fingerboard is radiused to 12", checking straightness every few minutes.
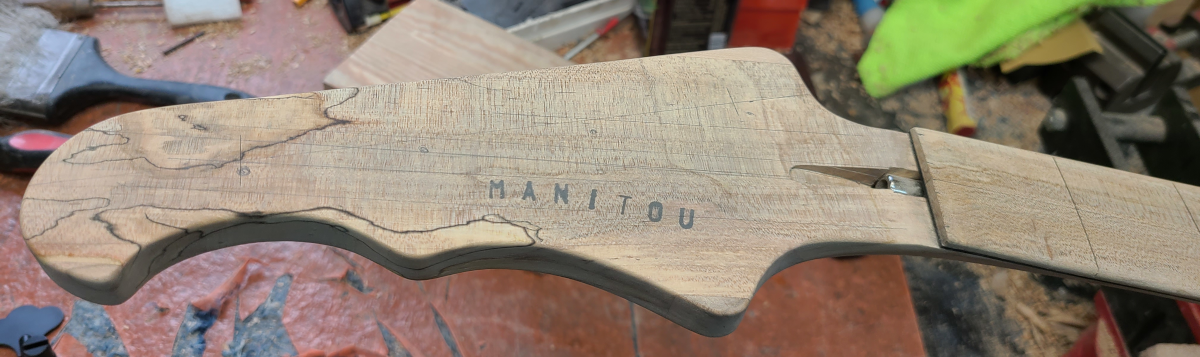
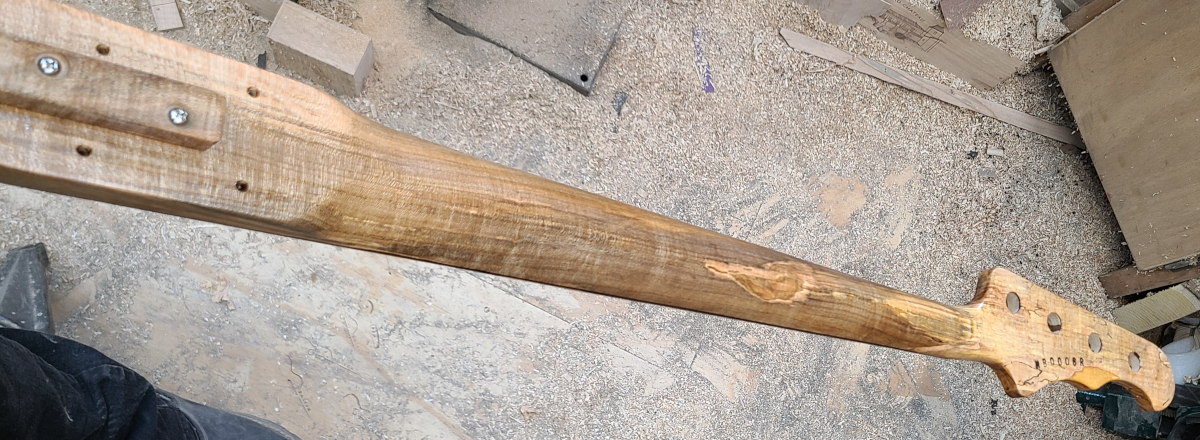
The logo template is set into place.
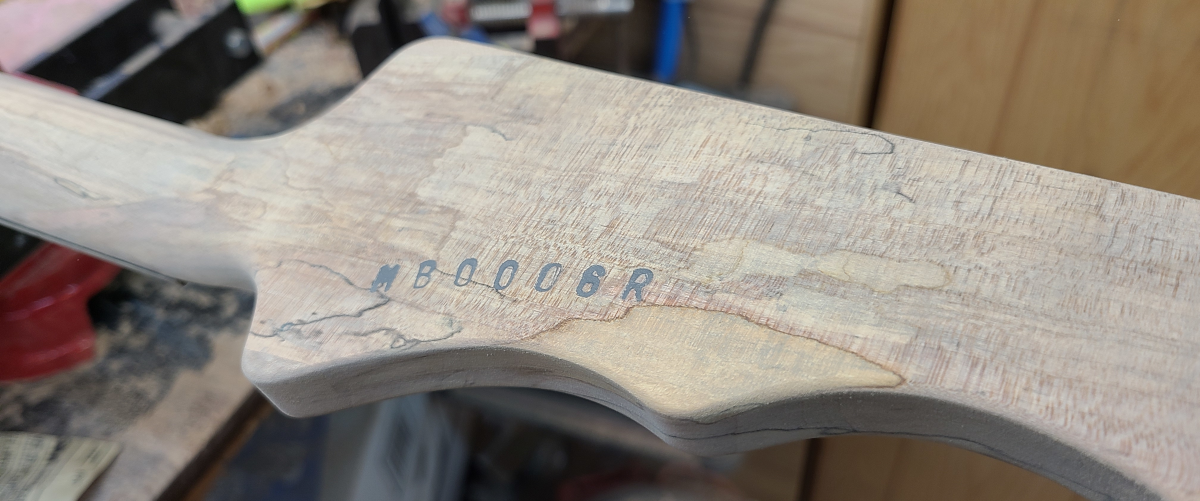
The logo and serial numbers are hammered into place, then filled with black pore filler and sanded back.
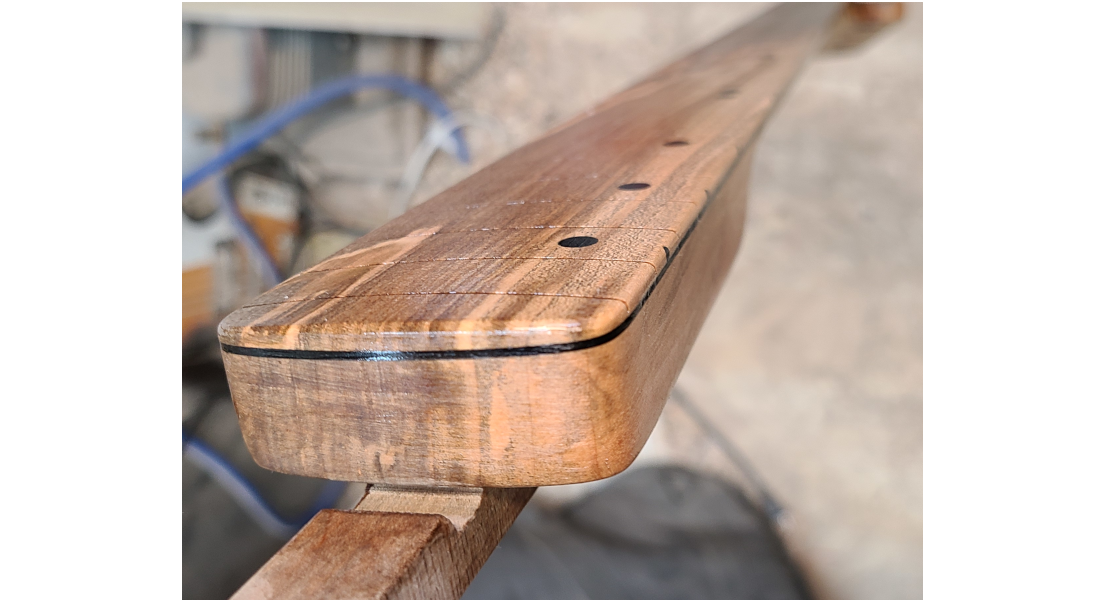
Tuner holes are located and drilled.
The first coat of sealer is applied, and the long arduous task of finishing the neck has begun!